Long and Short Stitch - Learn How to do This Modern Embroidery Technique
Introduction
I am so excited to introduce you to the wonderful world of Long and Short Stitch!
When I first started on my embroidery journey, I thought that this technique was quite complex and painstaking – which made me feel a bit daunted and hesitant to work with it.
You see, the traditional style uses quite fine thread, which is placed precisely to create a smooth overall effect. Which is absolutely beautiful, but can be quite challenging.
Then I realised that actually, there is a more modern way of working it, that is much freer, chunkier and more textured. Which turns out so beautiful too! And that’s when I started to embrace this technique, and fell in love with it myself.
I’ll show you both ways in this tutorial.
So what exactly is this technique?
Long and Short Stitch is a filler-style technique that can be used to fill in large shapes with a lovely textured effect.
This stitch works really well in large areas as an alternative to Satin Stitch. You can work this stitch in a single colour, or it’s a beautiful way to incorporate colour shading in your design (using a technique known as ‘thread-painting’).
Here’s a basic way to work this stitch
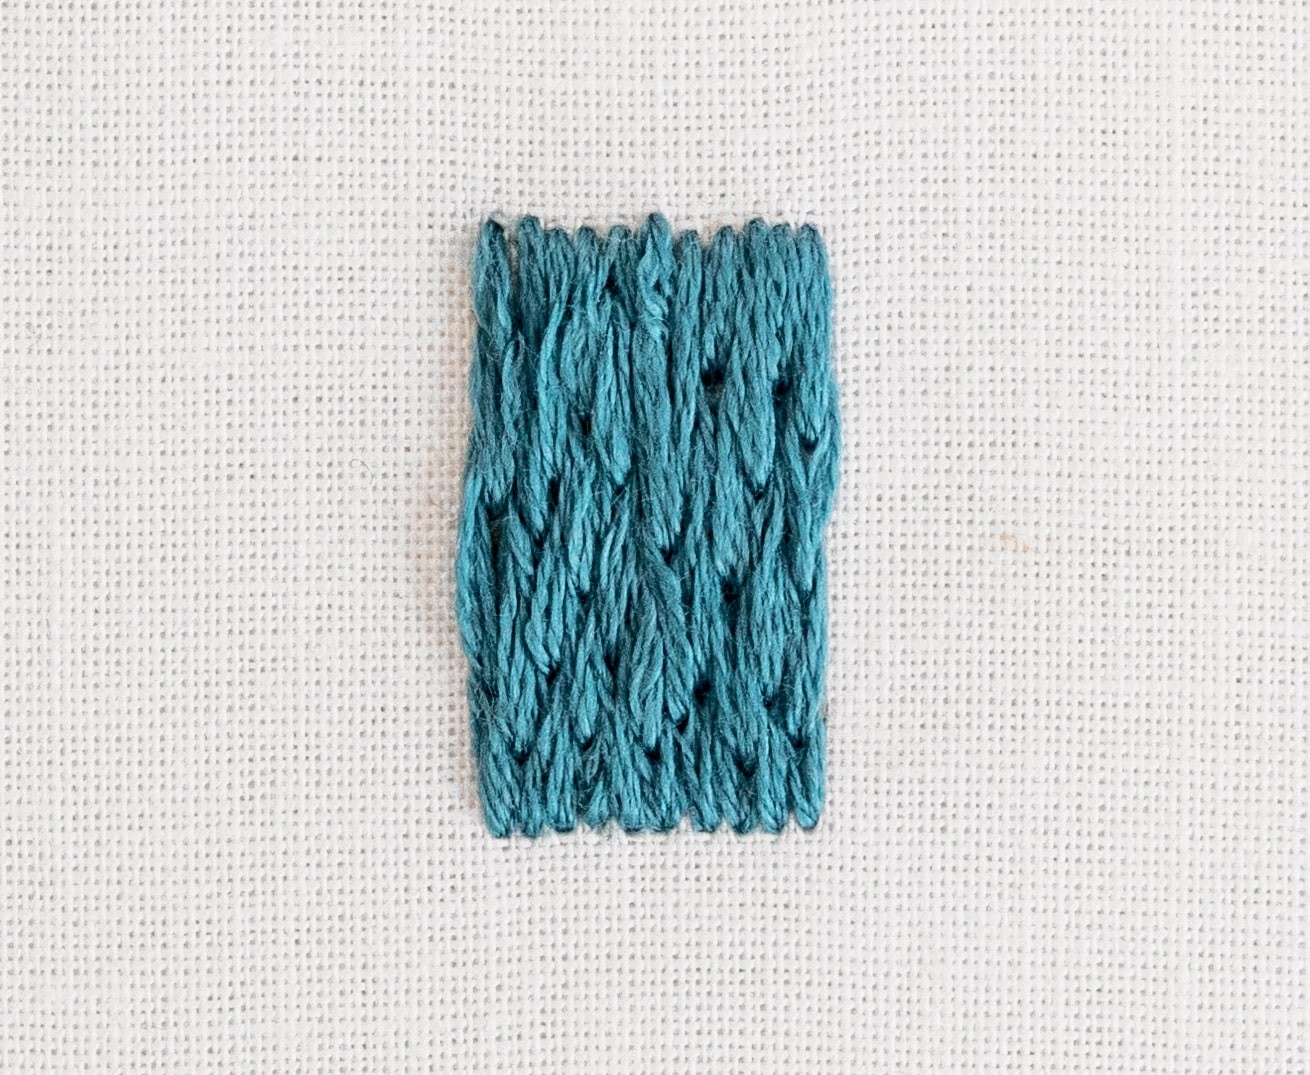
This technique is essentially a series of stitches stacked on top of each other, worked from one side of a shape to the other, until the shape is full. Let’s keep it simple and start by filling in a simple rectangle.
TIP BEFORE YOU START: It helps to draw directional lines on your shape, as a guide for the stitch angles.
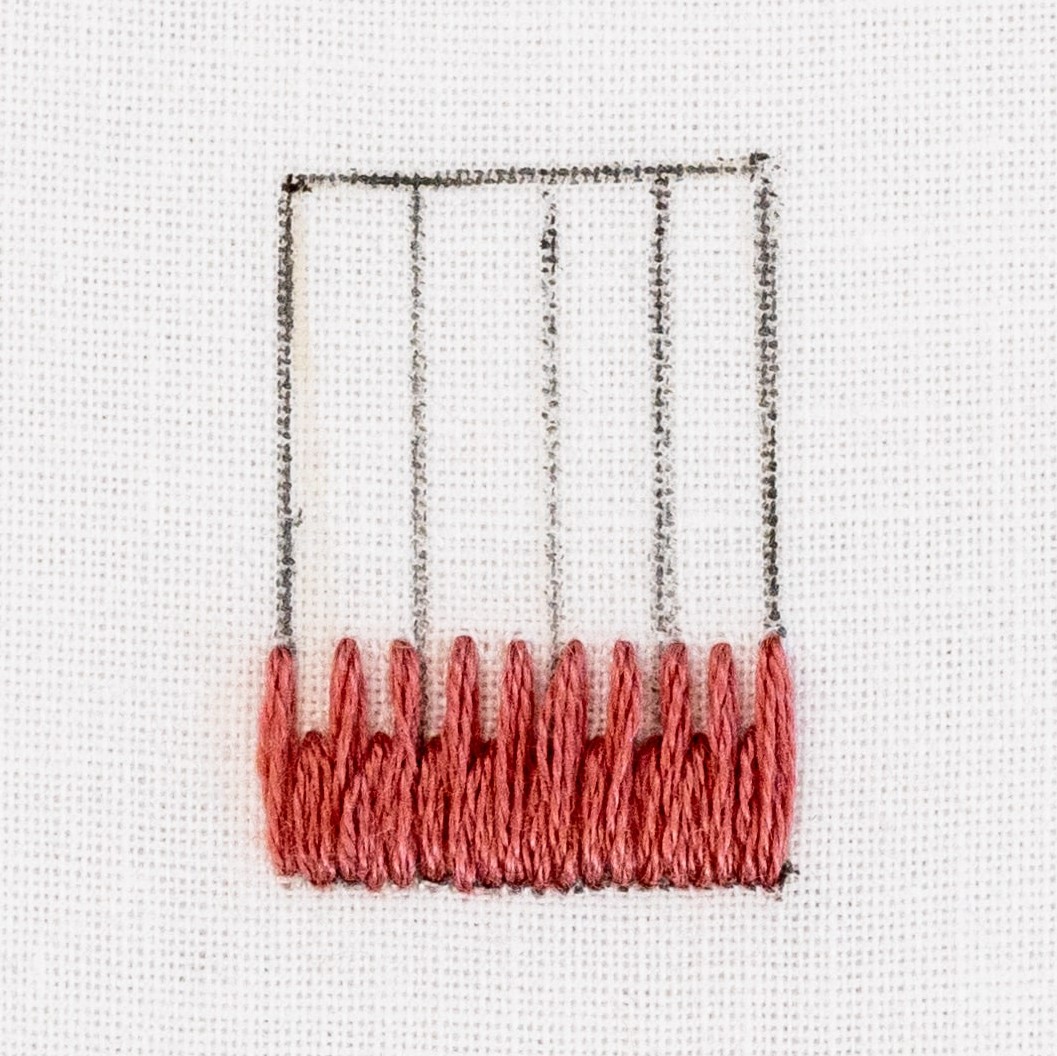
Step 1.
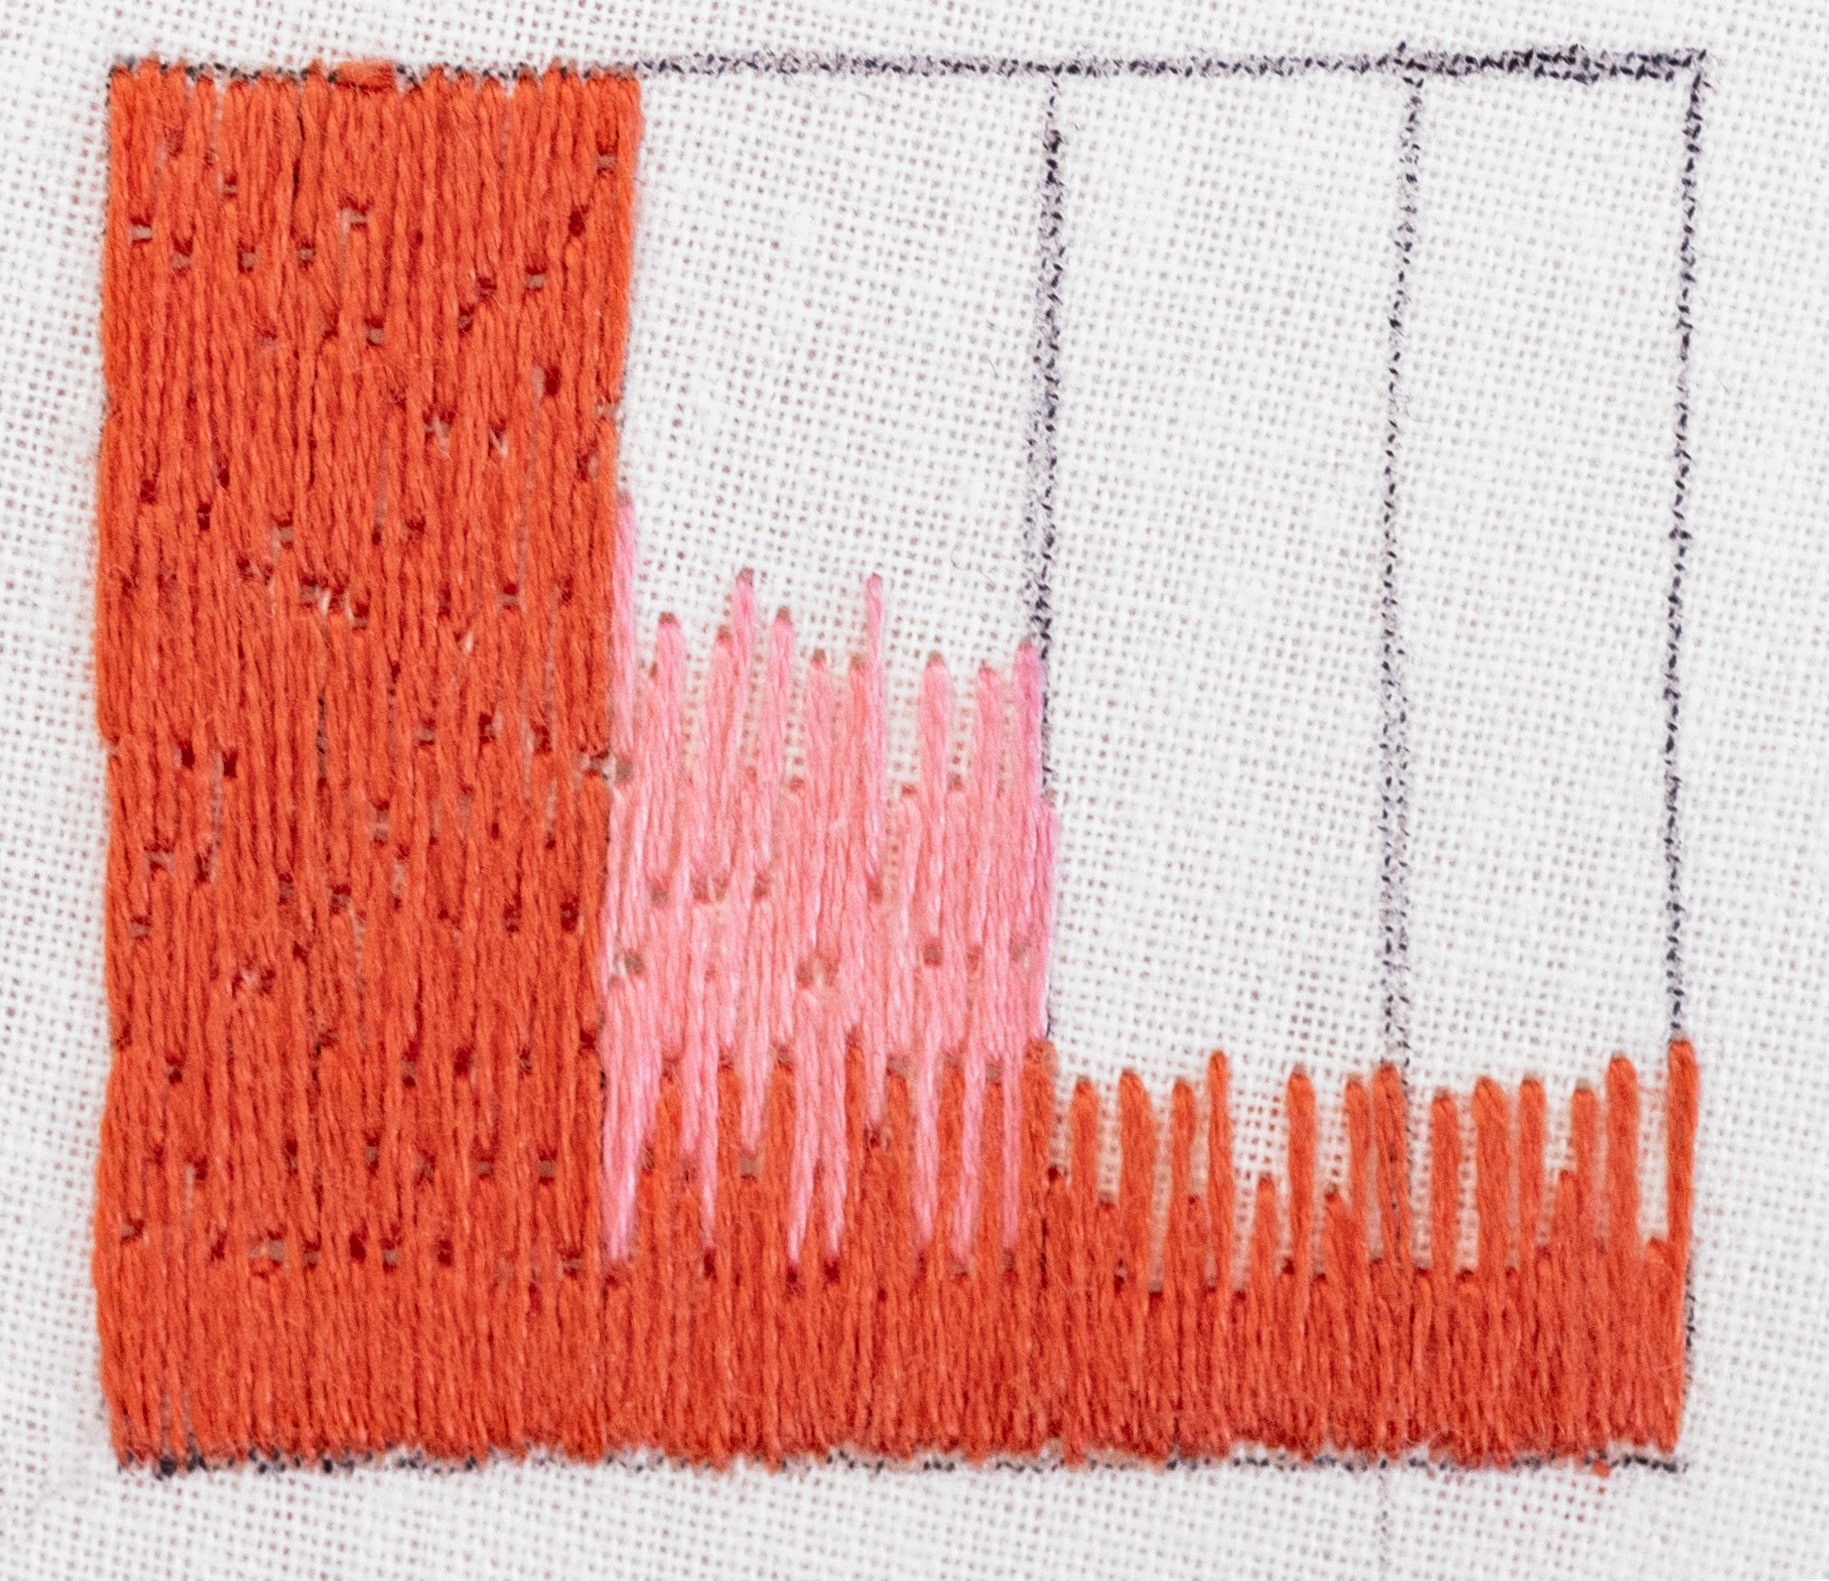
Start by working a series of stitches along the bottom row. Alternate between stitches which are longer and then shorter in length. There is no set rule, but make the ‘short’ stitches about half or 2/3 the length of the ‘long’ stitches.
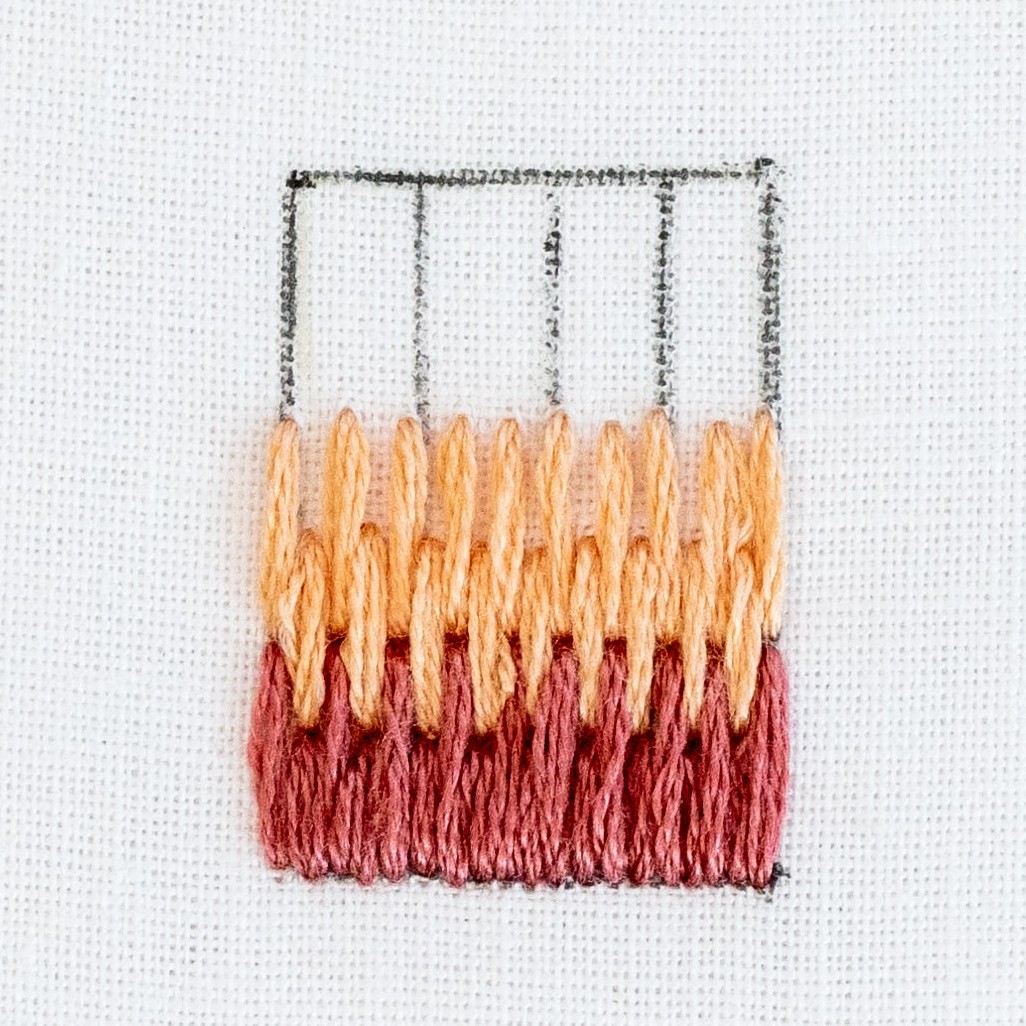
Step 2.
Work a second row of stitches on top of the first row. These stitches can all be about the same size, similar to the length of the ‘long’ stitches in step 1. As you can see, the second row isn’t staggered with ‘long then short’ stitches like the first, but because they are stacked on top of the first row, you continue to create the staggered effect.
Pretty cool huh?
Step 3.
Now do a third row of stitches, stacked on top of the previous row.
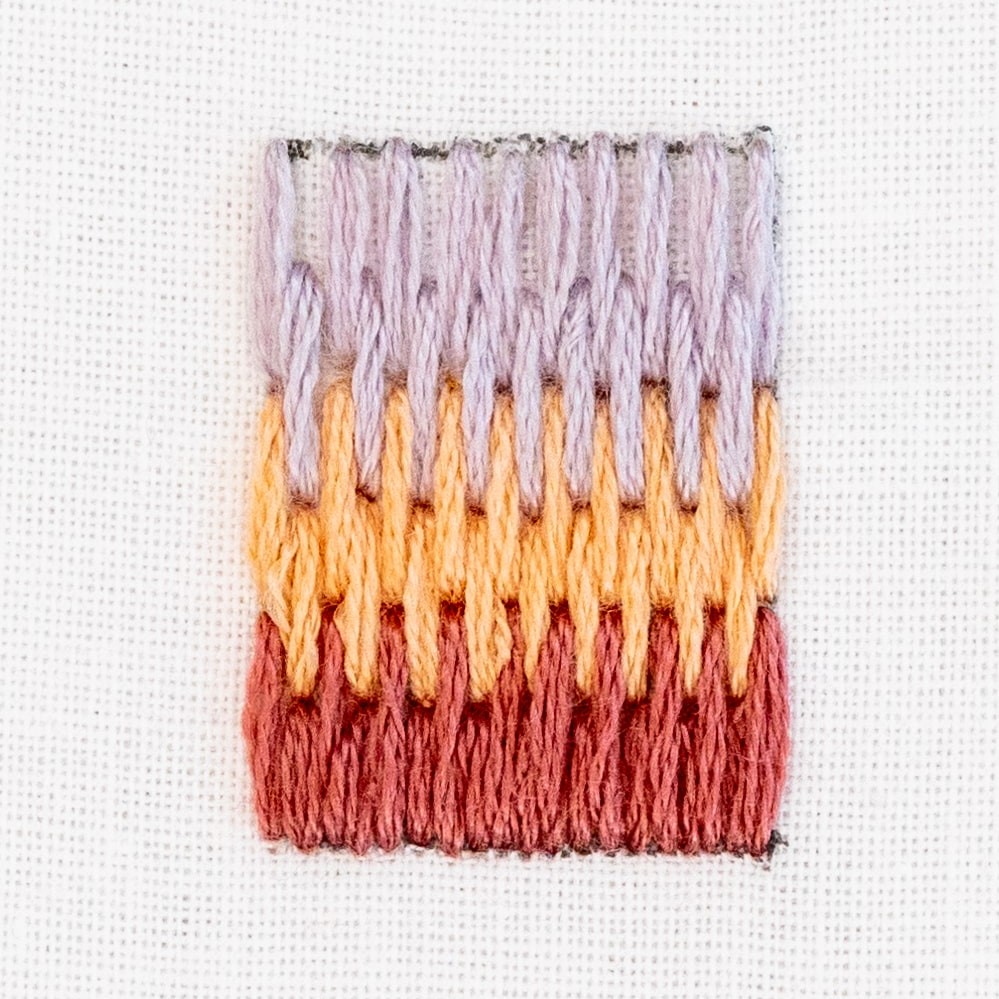
TIP: Take care to start each new stitch right where the previous one ended (as pictured here), so you don’t end up with gaps in between. It’s challenging to get this on point each time, so don’t worry if you do get gaps. And if you actually ‘split’ the previous stitch, that’s ok too.
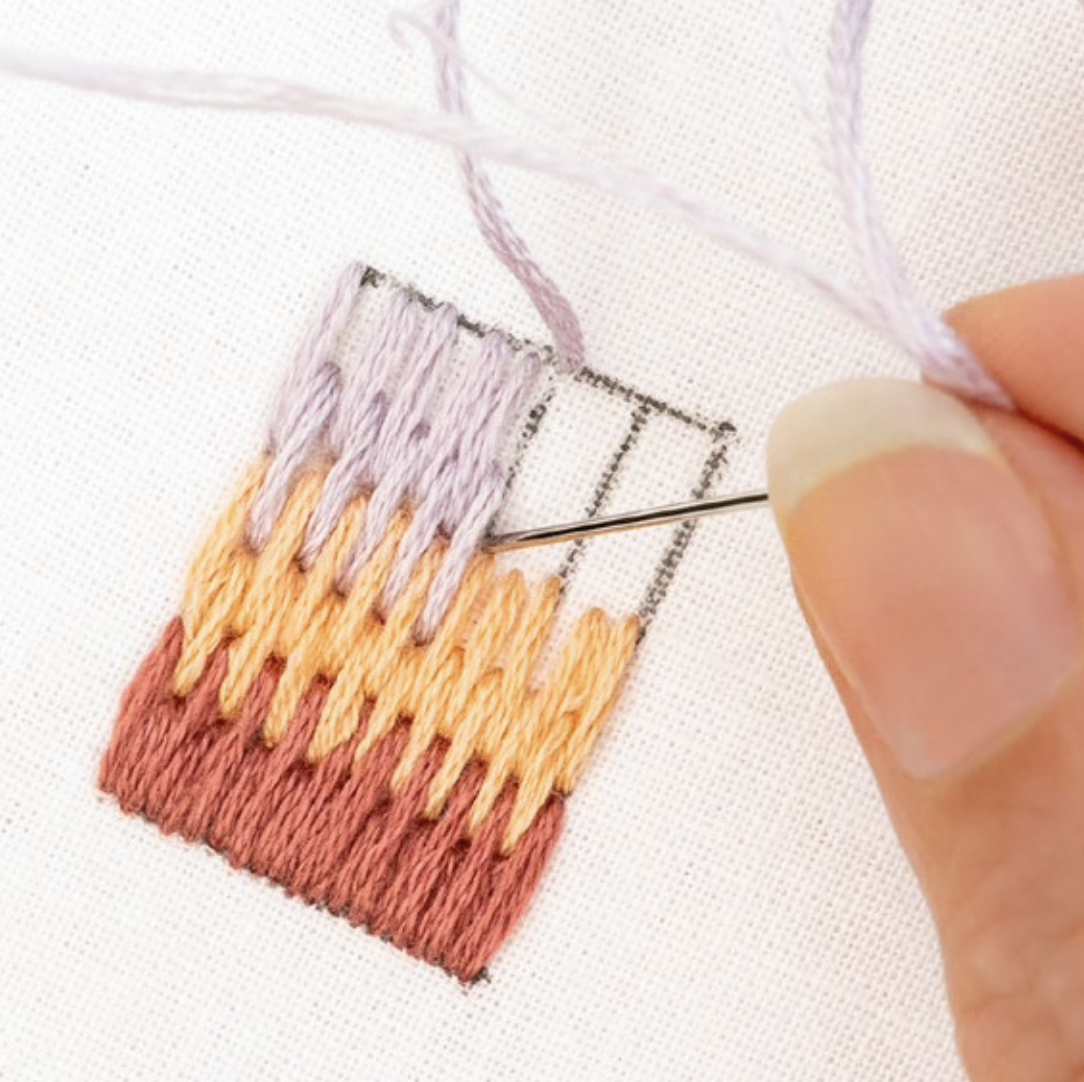
TIP – STITCH LENGTHS: You can have a play with your stitch-lengths as you work each row of stitches. If you keep them super consistent, you will have a very regular pattern with your stitches. Whereas if you vary the stitch lengths, as you can see I’ve done from step 4 onwards, you’ll get more of a random effect. Both look great!
Step 4.
Keep stacking rows of stitches, to slowly fill your shape. It can be challenging to get all of the stitches to sit on the consistent angle, but the directional guidelines should help. I’ve increased the size of the rectangle to fit in couple more rows, as you can see in the picture here.
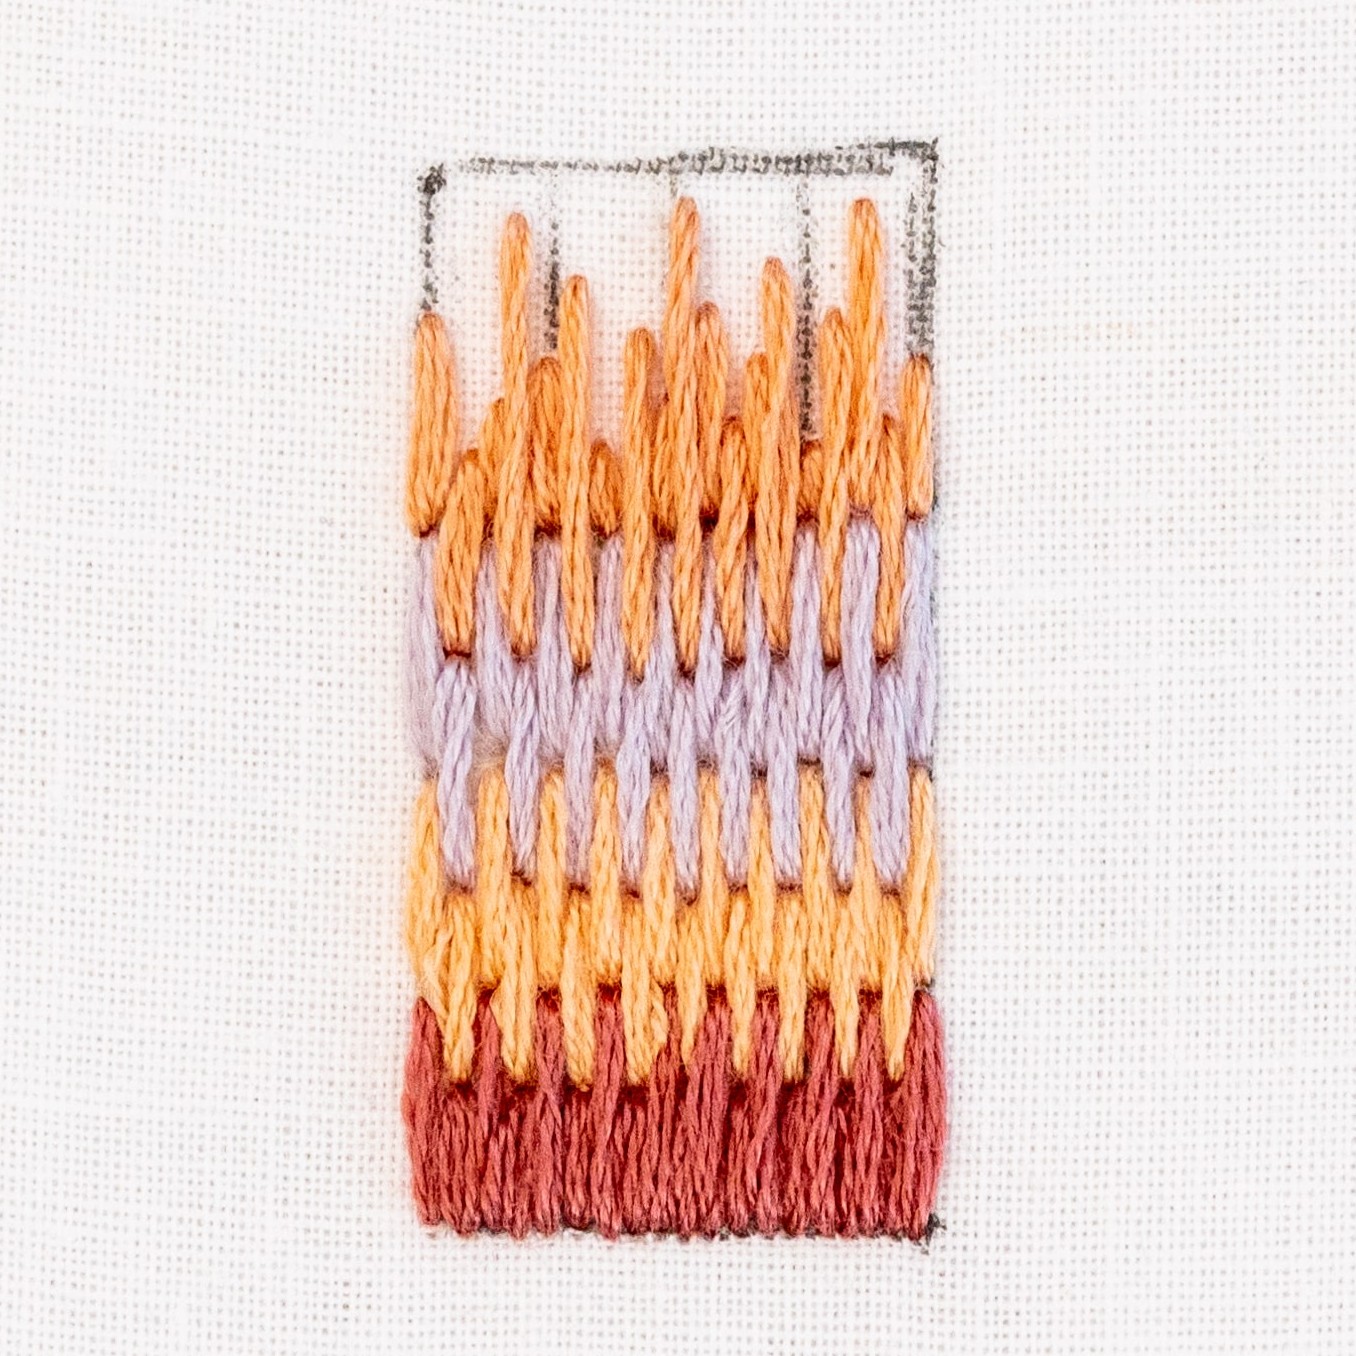
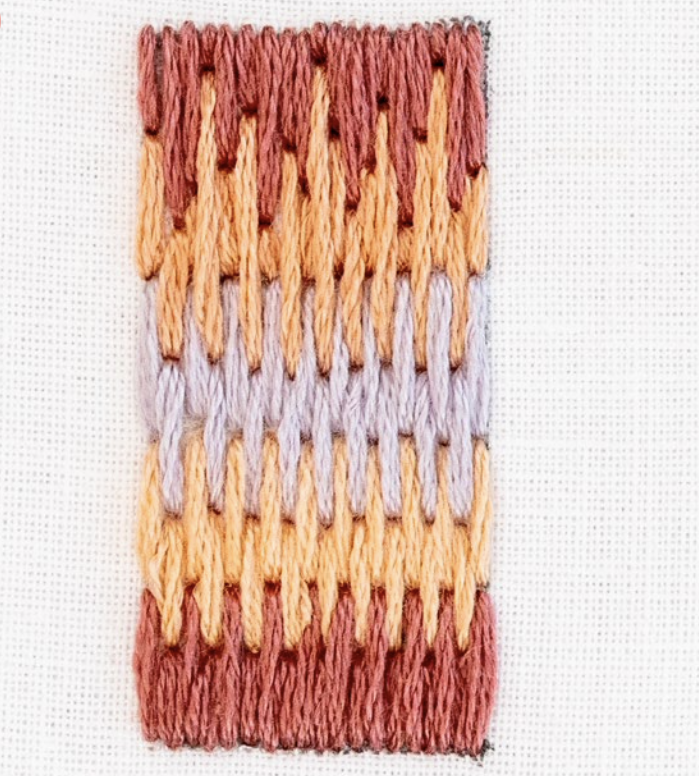
Step 5.
When you work the final row of stitches, you’ll need to stagger the stitch-lengths, so that they all finish on the far edge.
This stitch definitely takes some practice, before you’ll feel comfortable filling in areas of your design with it. And you might find it quite challenging to get all of your stitches to line up consistently. But don’t worry, once you get the hang of it, it’s quite satisfying.
Let’s look at working this technique with fine precision
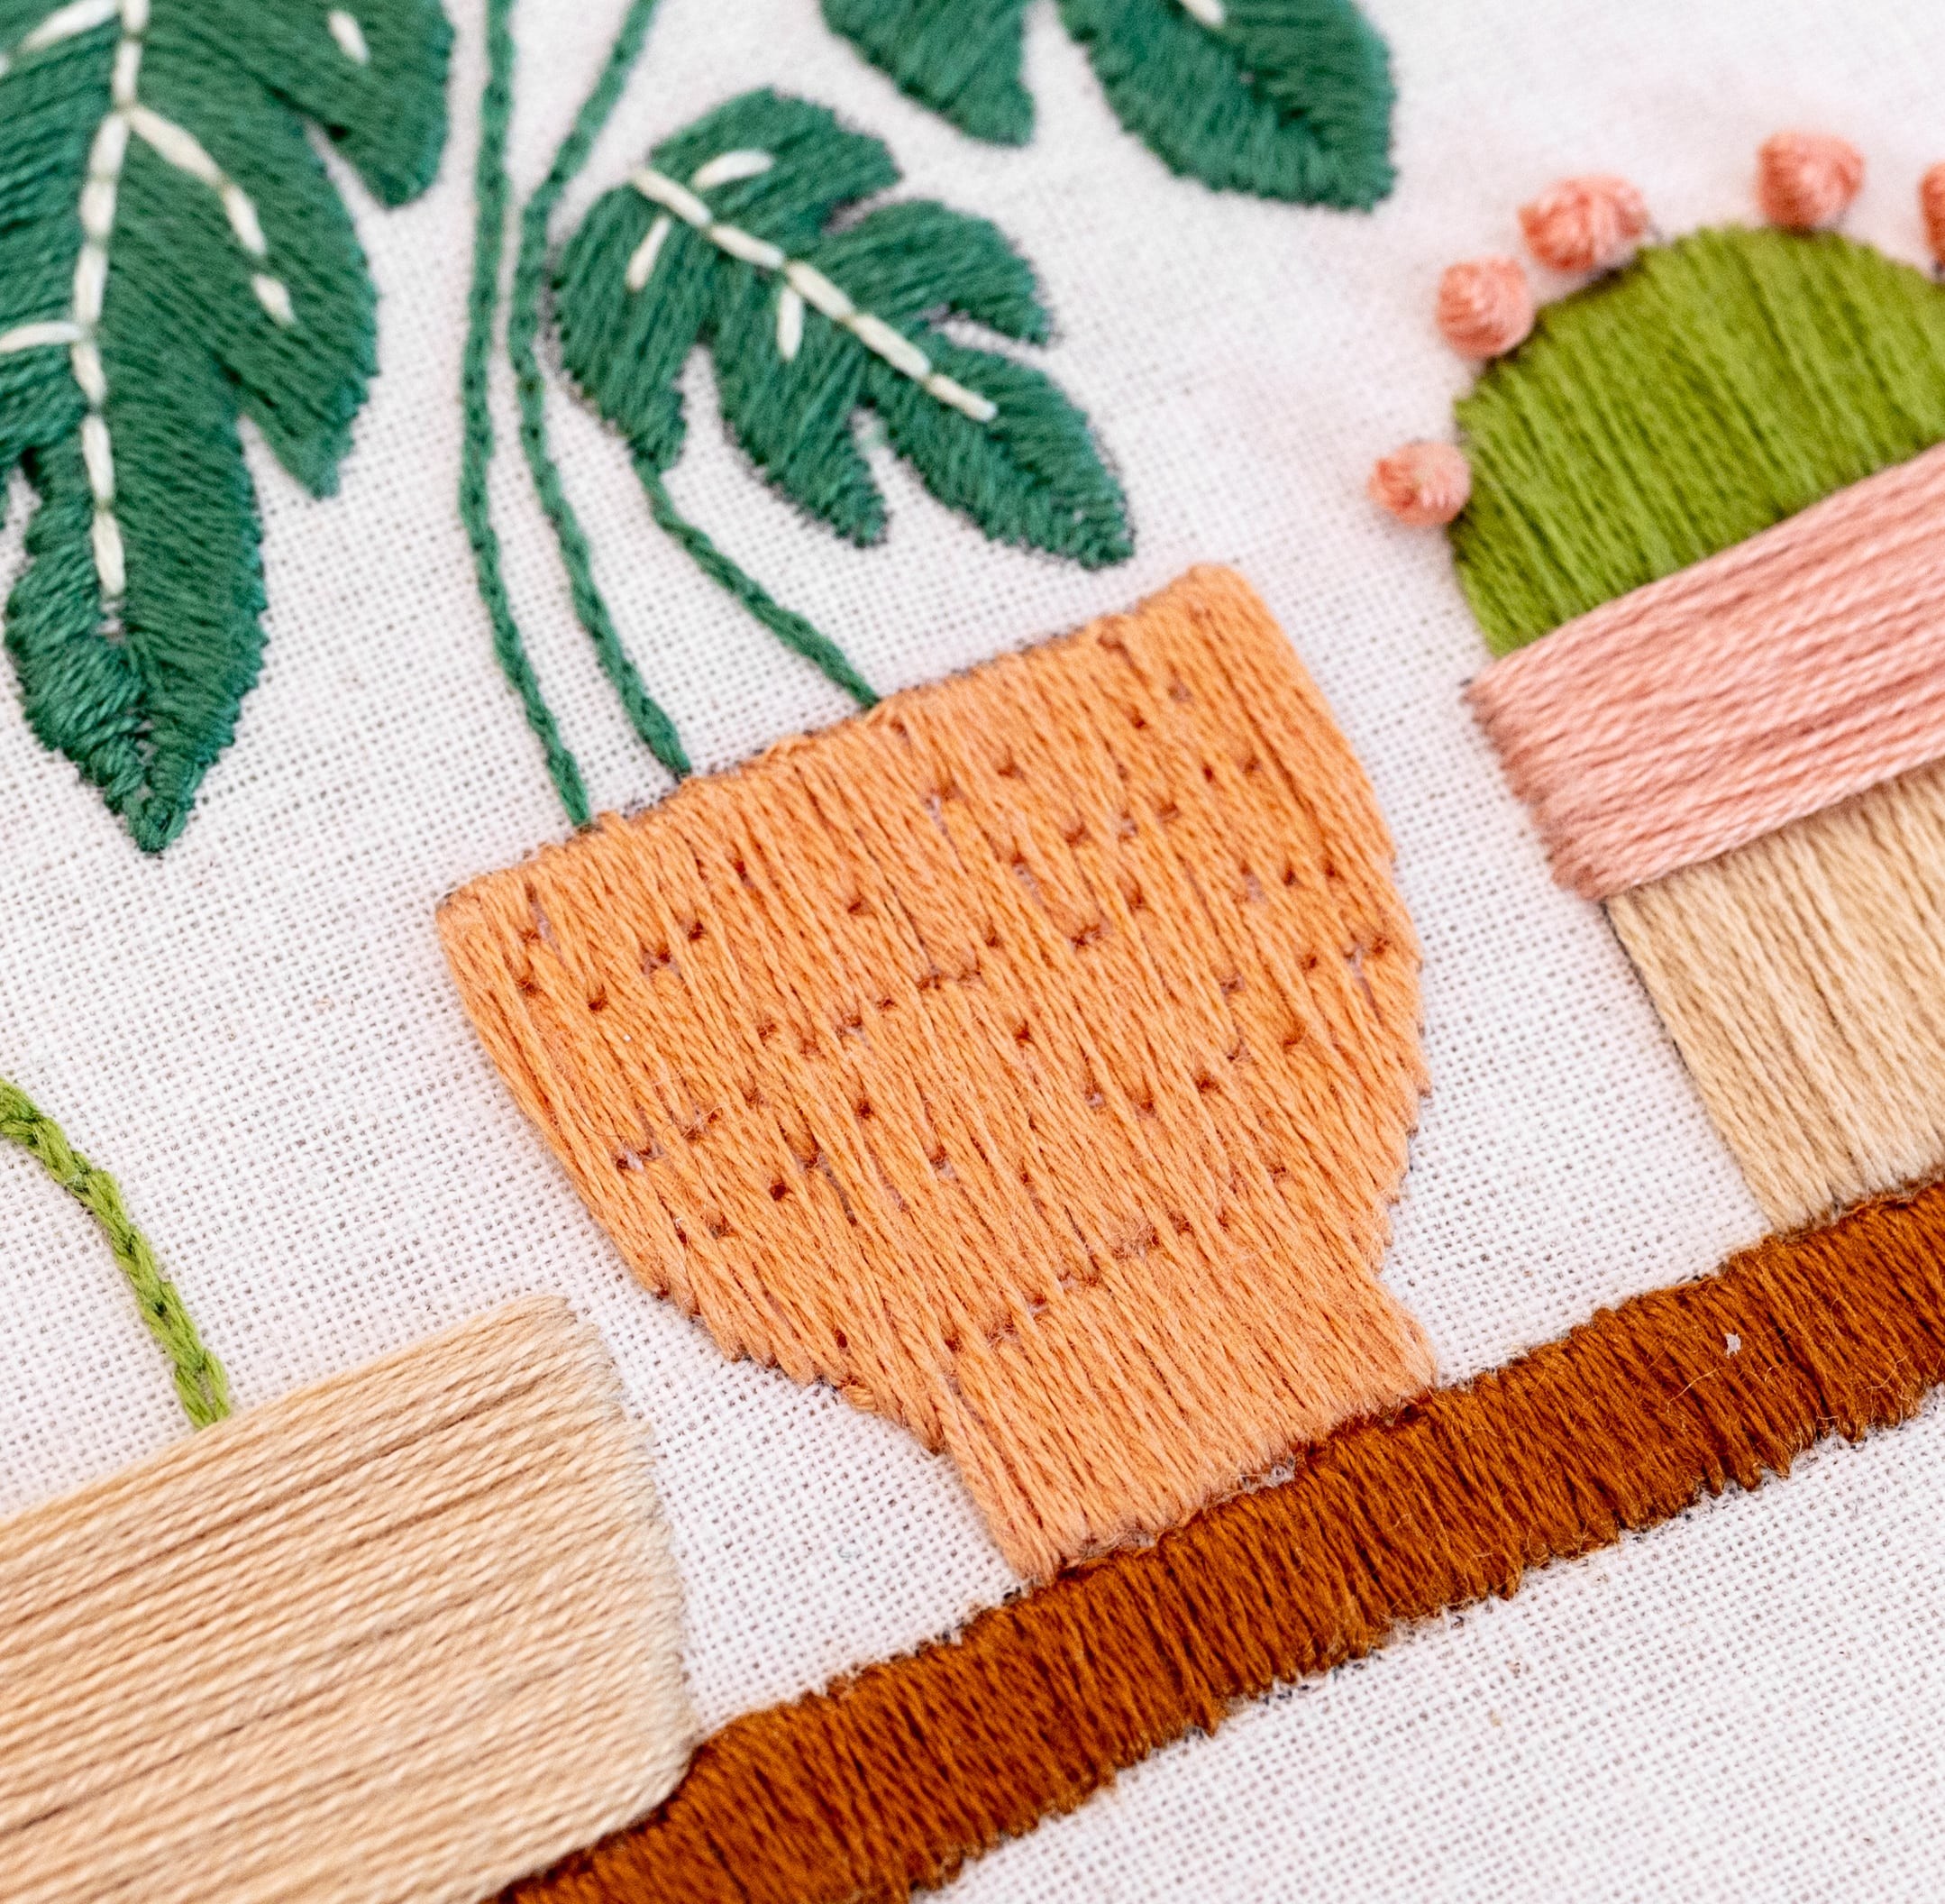
When you work this technique in a precise way, with consistent stitch angles and fine thread (e.g. 1, 2 or 3 strands of floss), it can create such a lovely and smooth effect. It definitely takes time and care to achieve these results, but you can see why it’s a great alternative to Satin Stitch!
These examples below show Long and Short Stitch worked with 2 or 3 strands of floss. See how they create quite a smooth result – which looks so pretty!
Now, let’s explore how we can work this technique with more freedom and flexibility
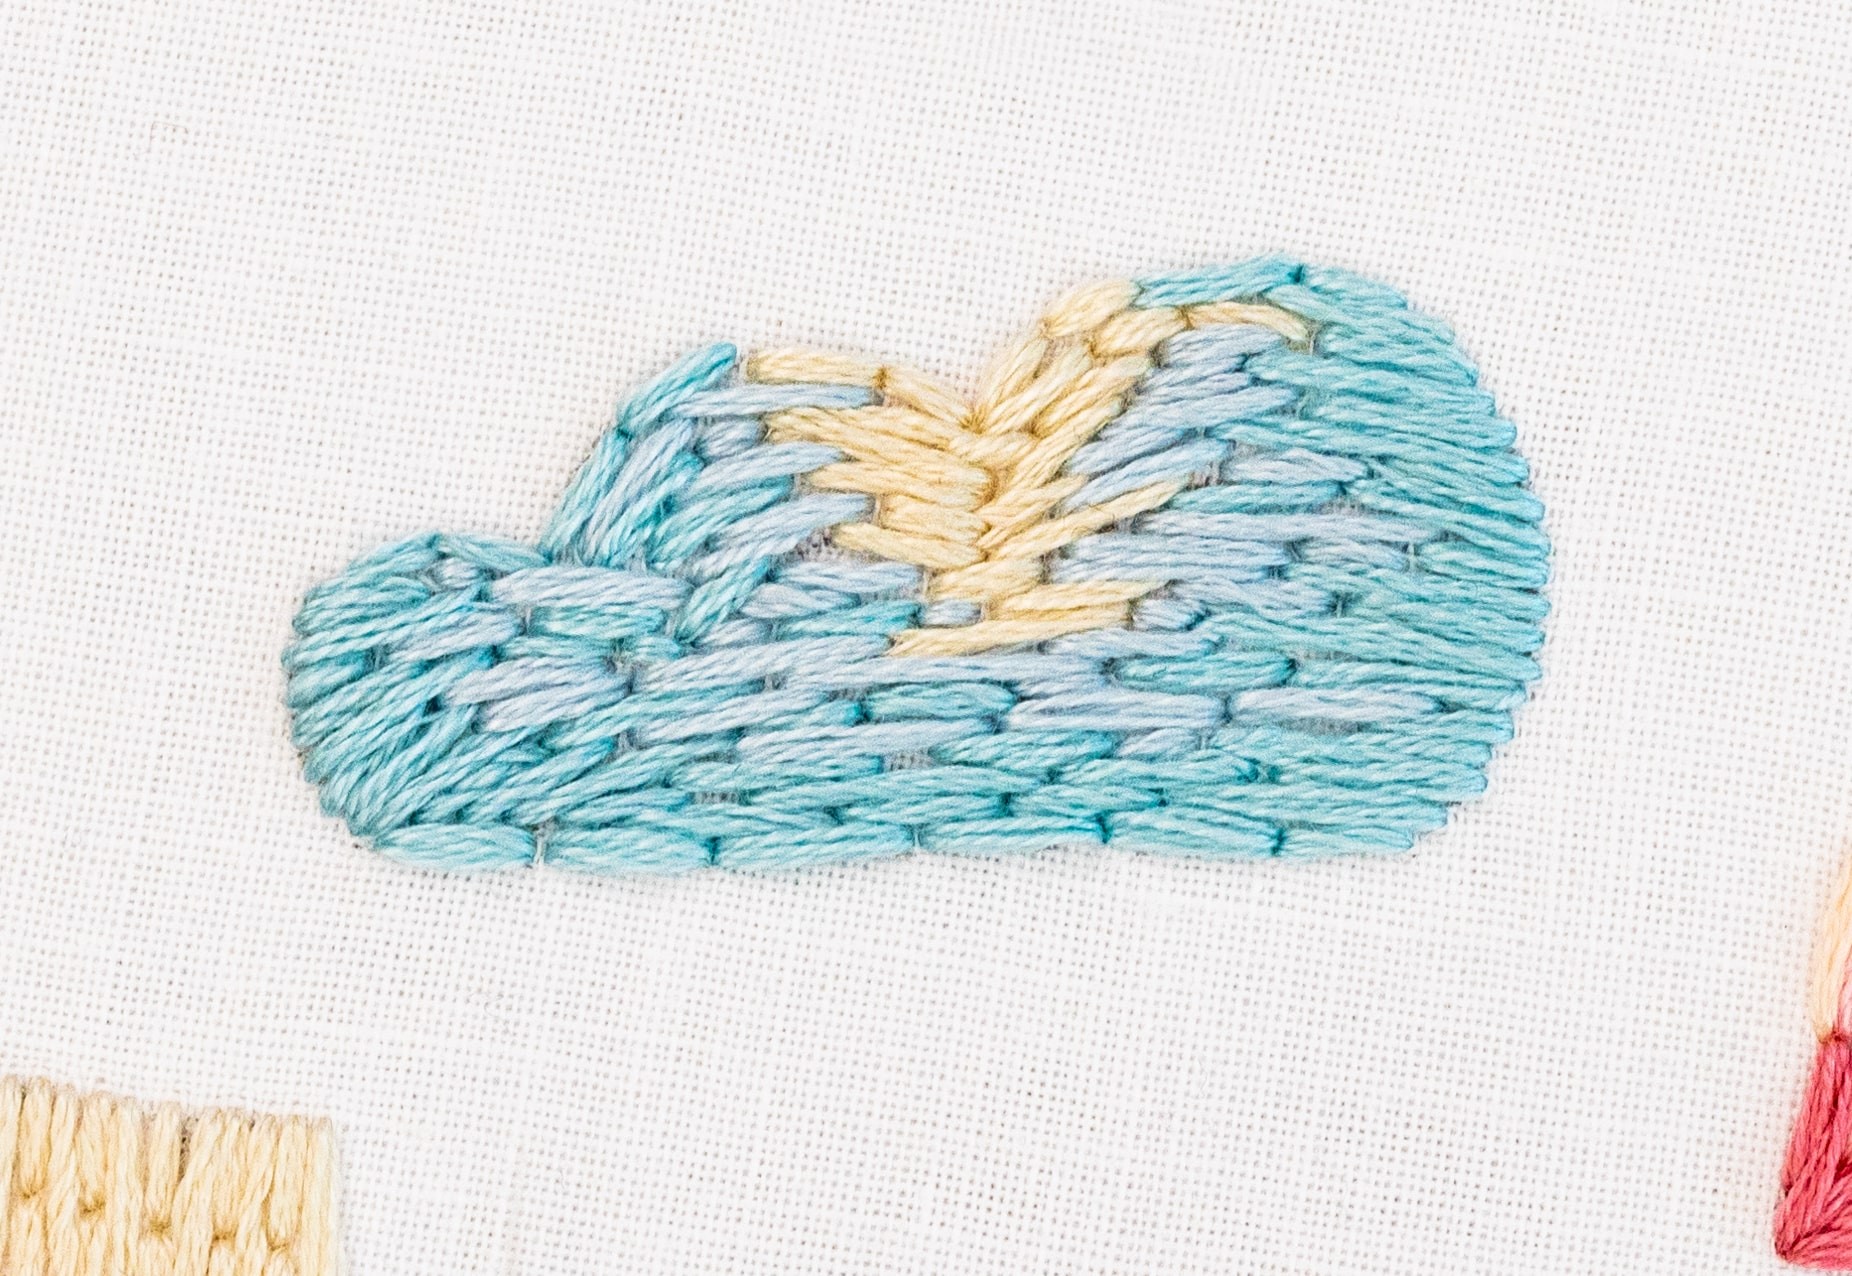
I love to stitch this technique in quite an abstract and free way – it’s really fun! The result is similar to what may be referred to as ‘Variated Back Stitch’ or ‘Brick Stitch’.
It creates an area filled with lots of texture, chunky threads and movement. Here’s my tips for how to work Long and Short Stitch in this manner:
-
Vary the stitch lengths: Really focus on varying the stitch lengths - do whatever works for the shape you’re filling, and keep it varied. I actually find that this helps to make the overall area look evenly textured, because the rows of stitches are disrupted across the pattern. It’s like organised chaos!
-
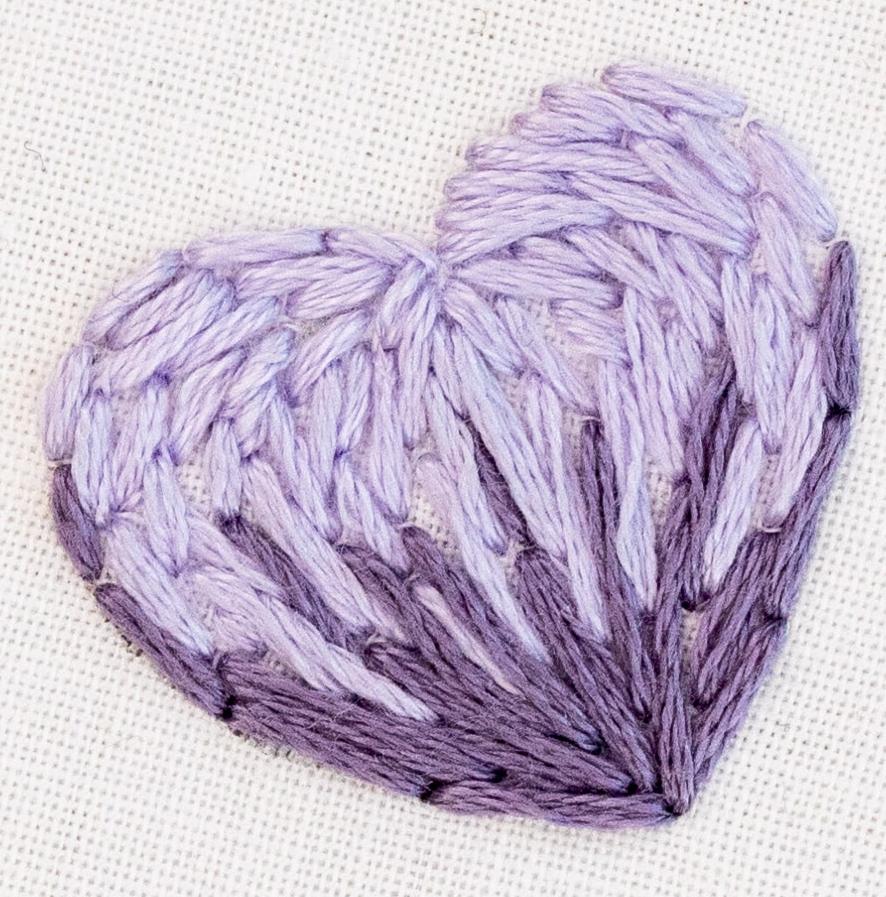
Vary the stitch angles: As you fill in your shape, angle your stitches in whatever way feels comfortable. This means that you can add some flow and curve into the overall effect. You can also work this quite freely on a shape that tapers in like a petal, leaf or heart.
-
Use thicker thread: I personally love to work Long and Short Stitch with the full 6 strands of floss. This creates quite a textured and chunky effect. And it means that you fill in each area a LOT faster, compared with using less strands of floss.
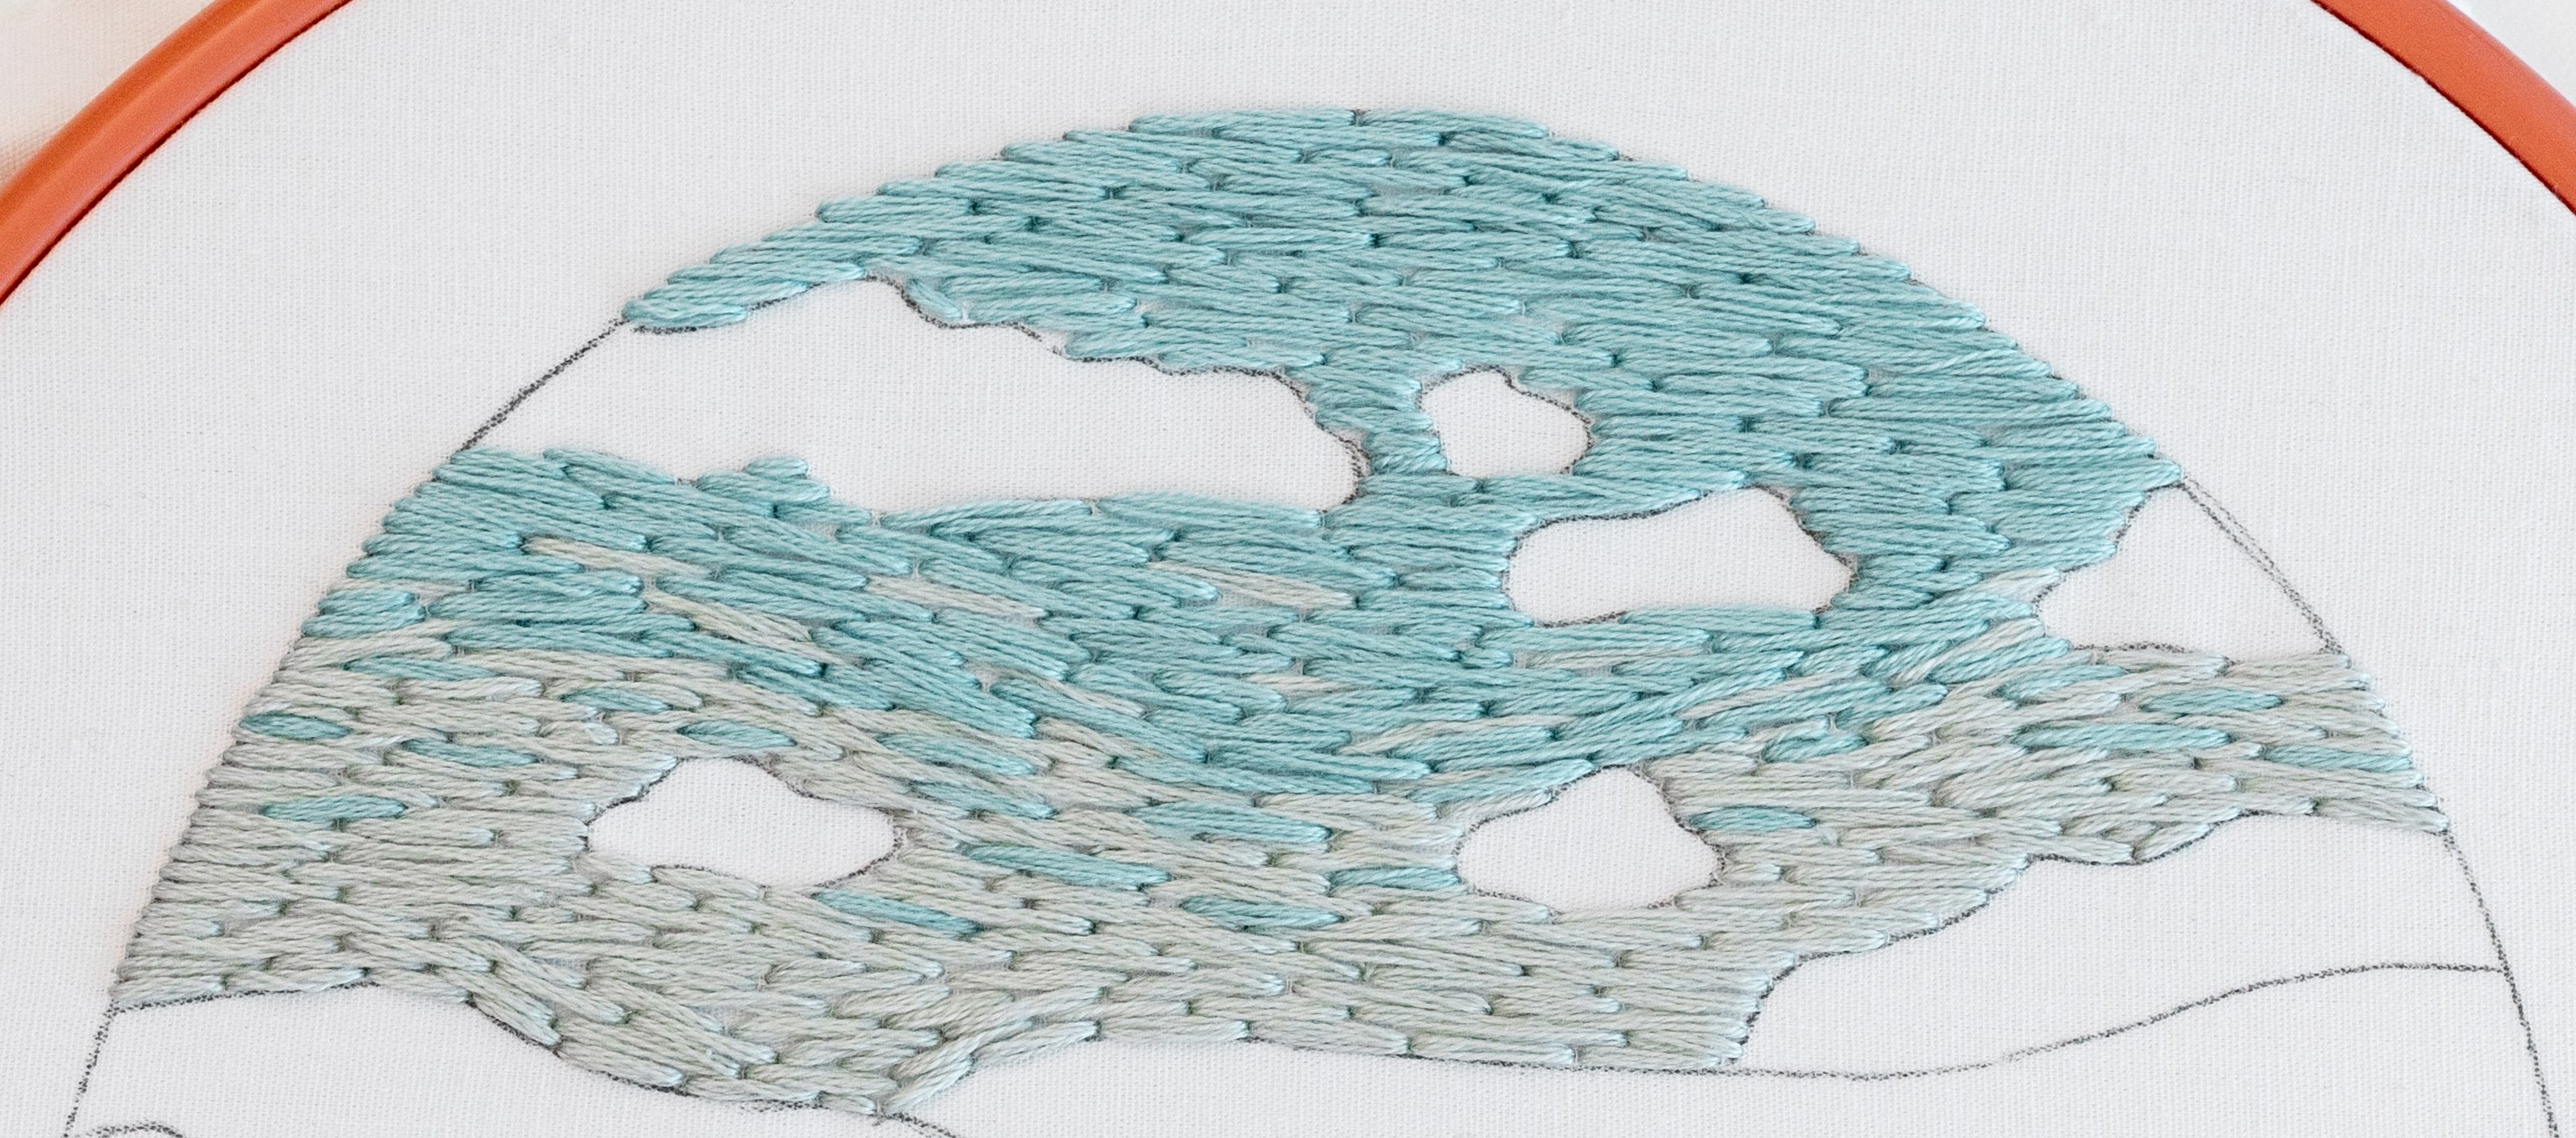
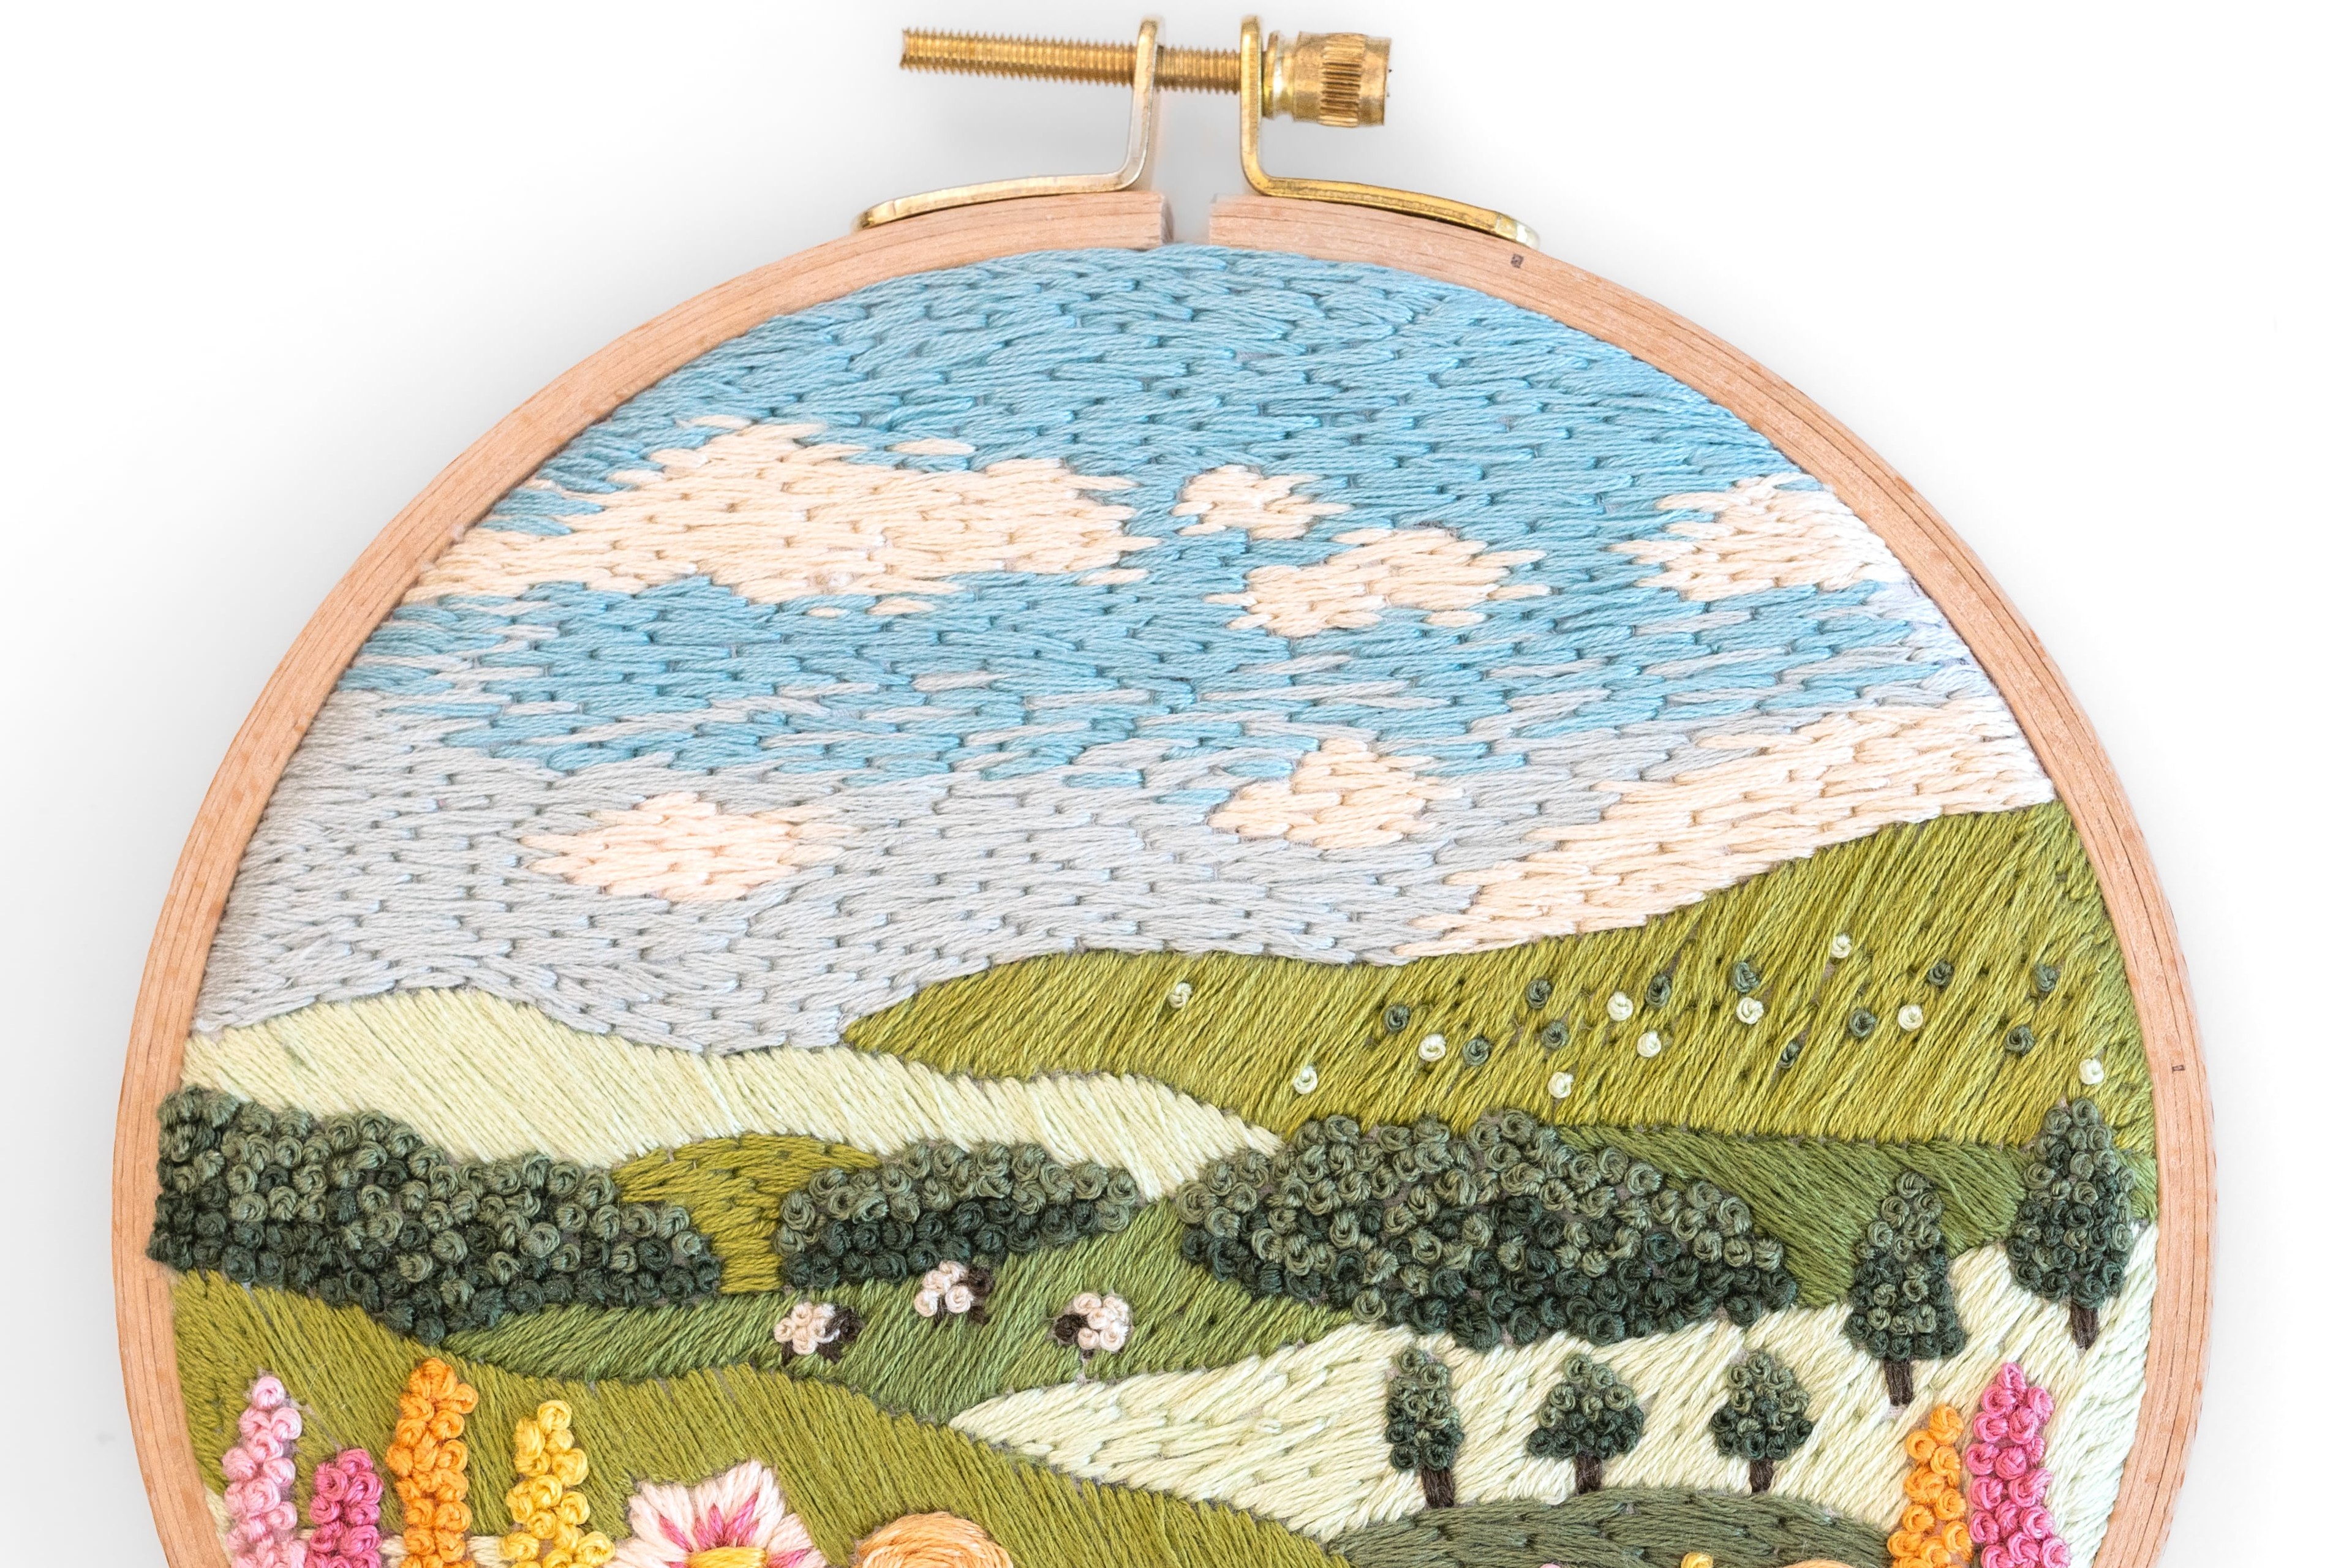
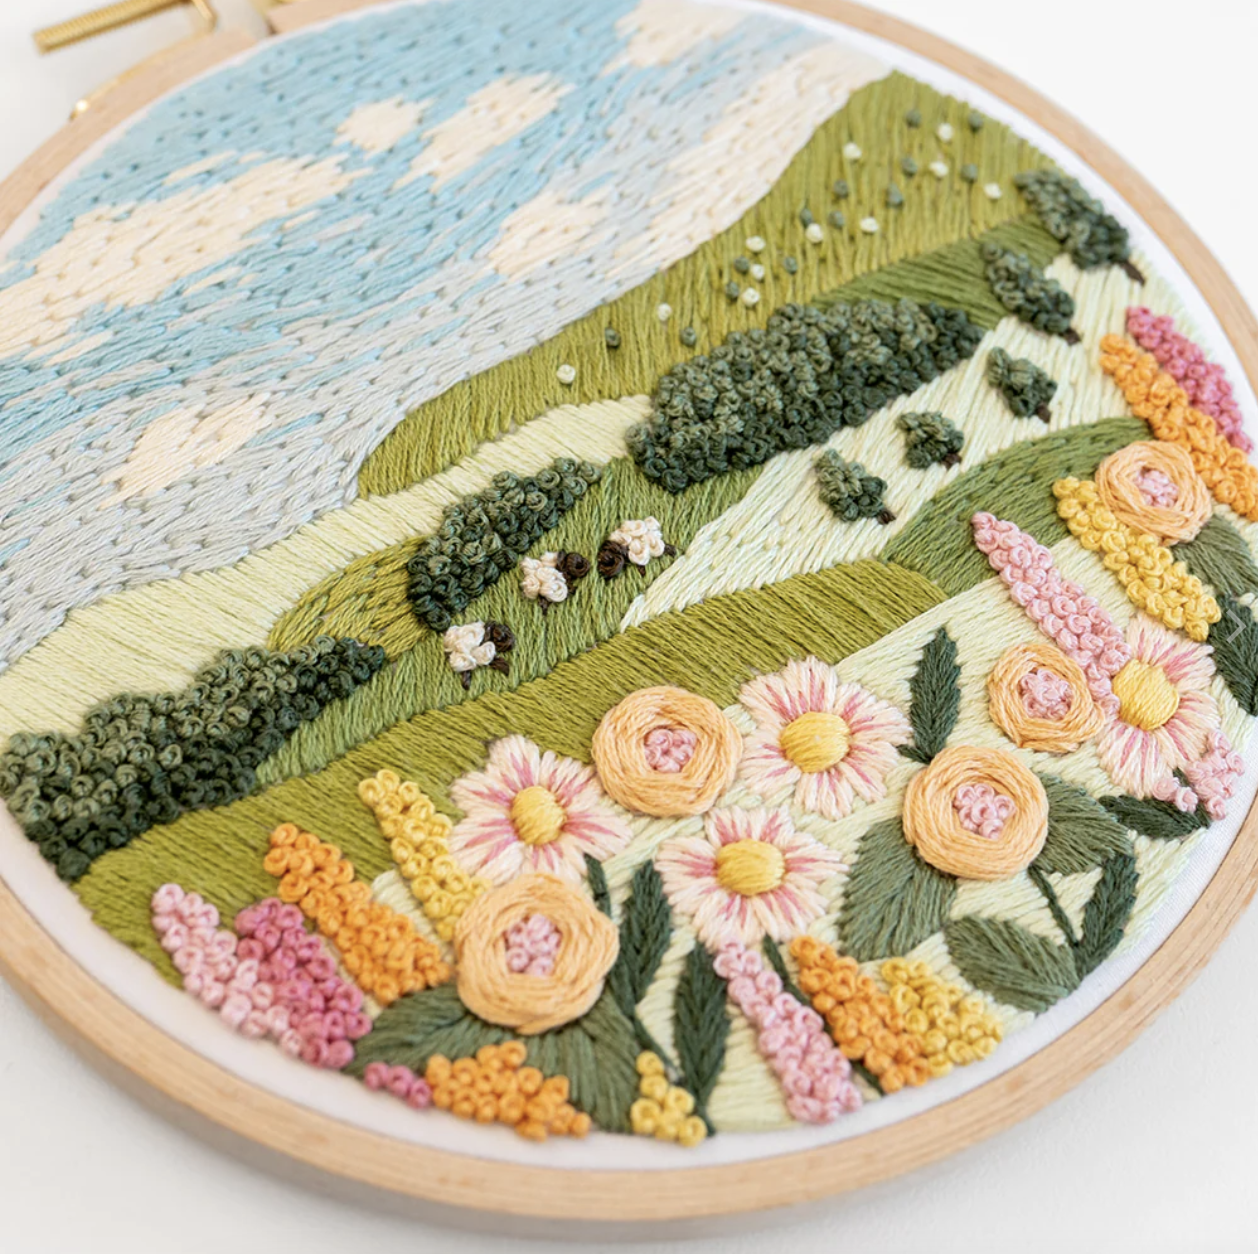
This example here shows the sky in my ‘Spring Meadows’ pattern – see how the stitches are a chunkier effect with six strands of floss, all varied in length, and the angles follow the lovely curve of the hills and clouds.
-
Mix it up with Back Stitch: The way I look at it, an area of Long and Short Stitch can either be viewed as just that – e.g. rows of stitches stacked upon each other, worked from one side of the shape to the other, until the shape is completely covered. But if you look at that exact same area of stitching, you could also view it as lines of Back Stitch, worked back and forth across the shape until it’s filled. Take a look at the images in this tutorial, and hopefully you can see what I mean. Because once you figure this out, it gives you more freedom to play around with the way you fill your shape. Sounds good to me!
TIP: Here are a couple of examples to help further explain the concept of mixing it up with Back Stitch:
1. BACK STITCHED OUTLINE
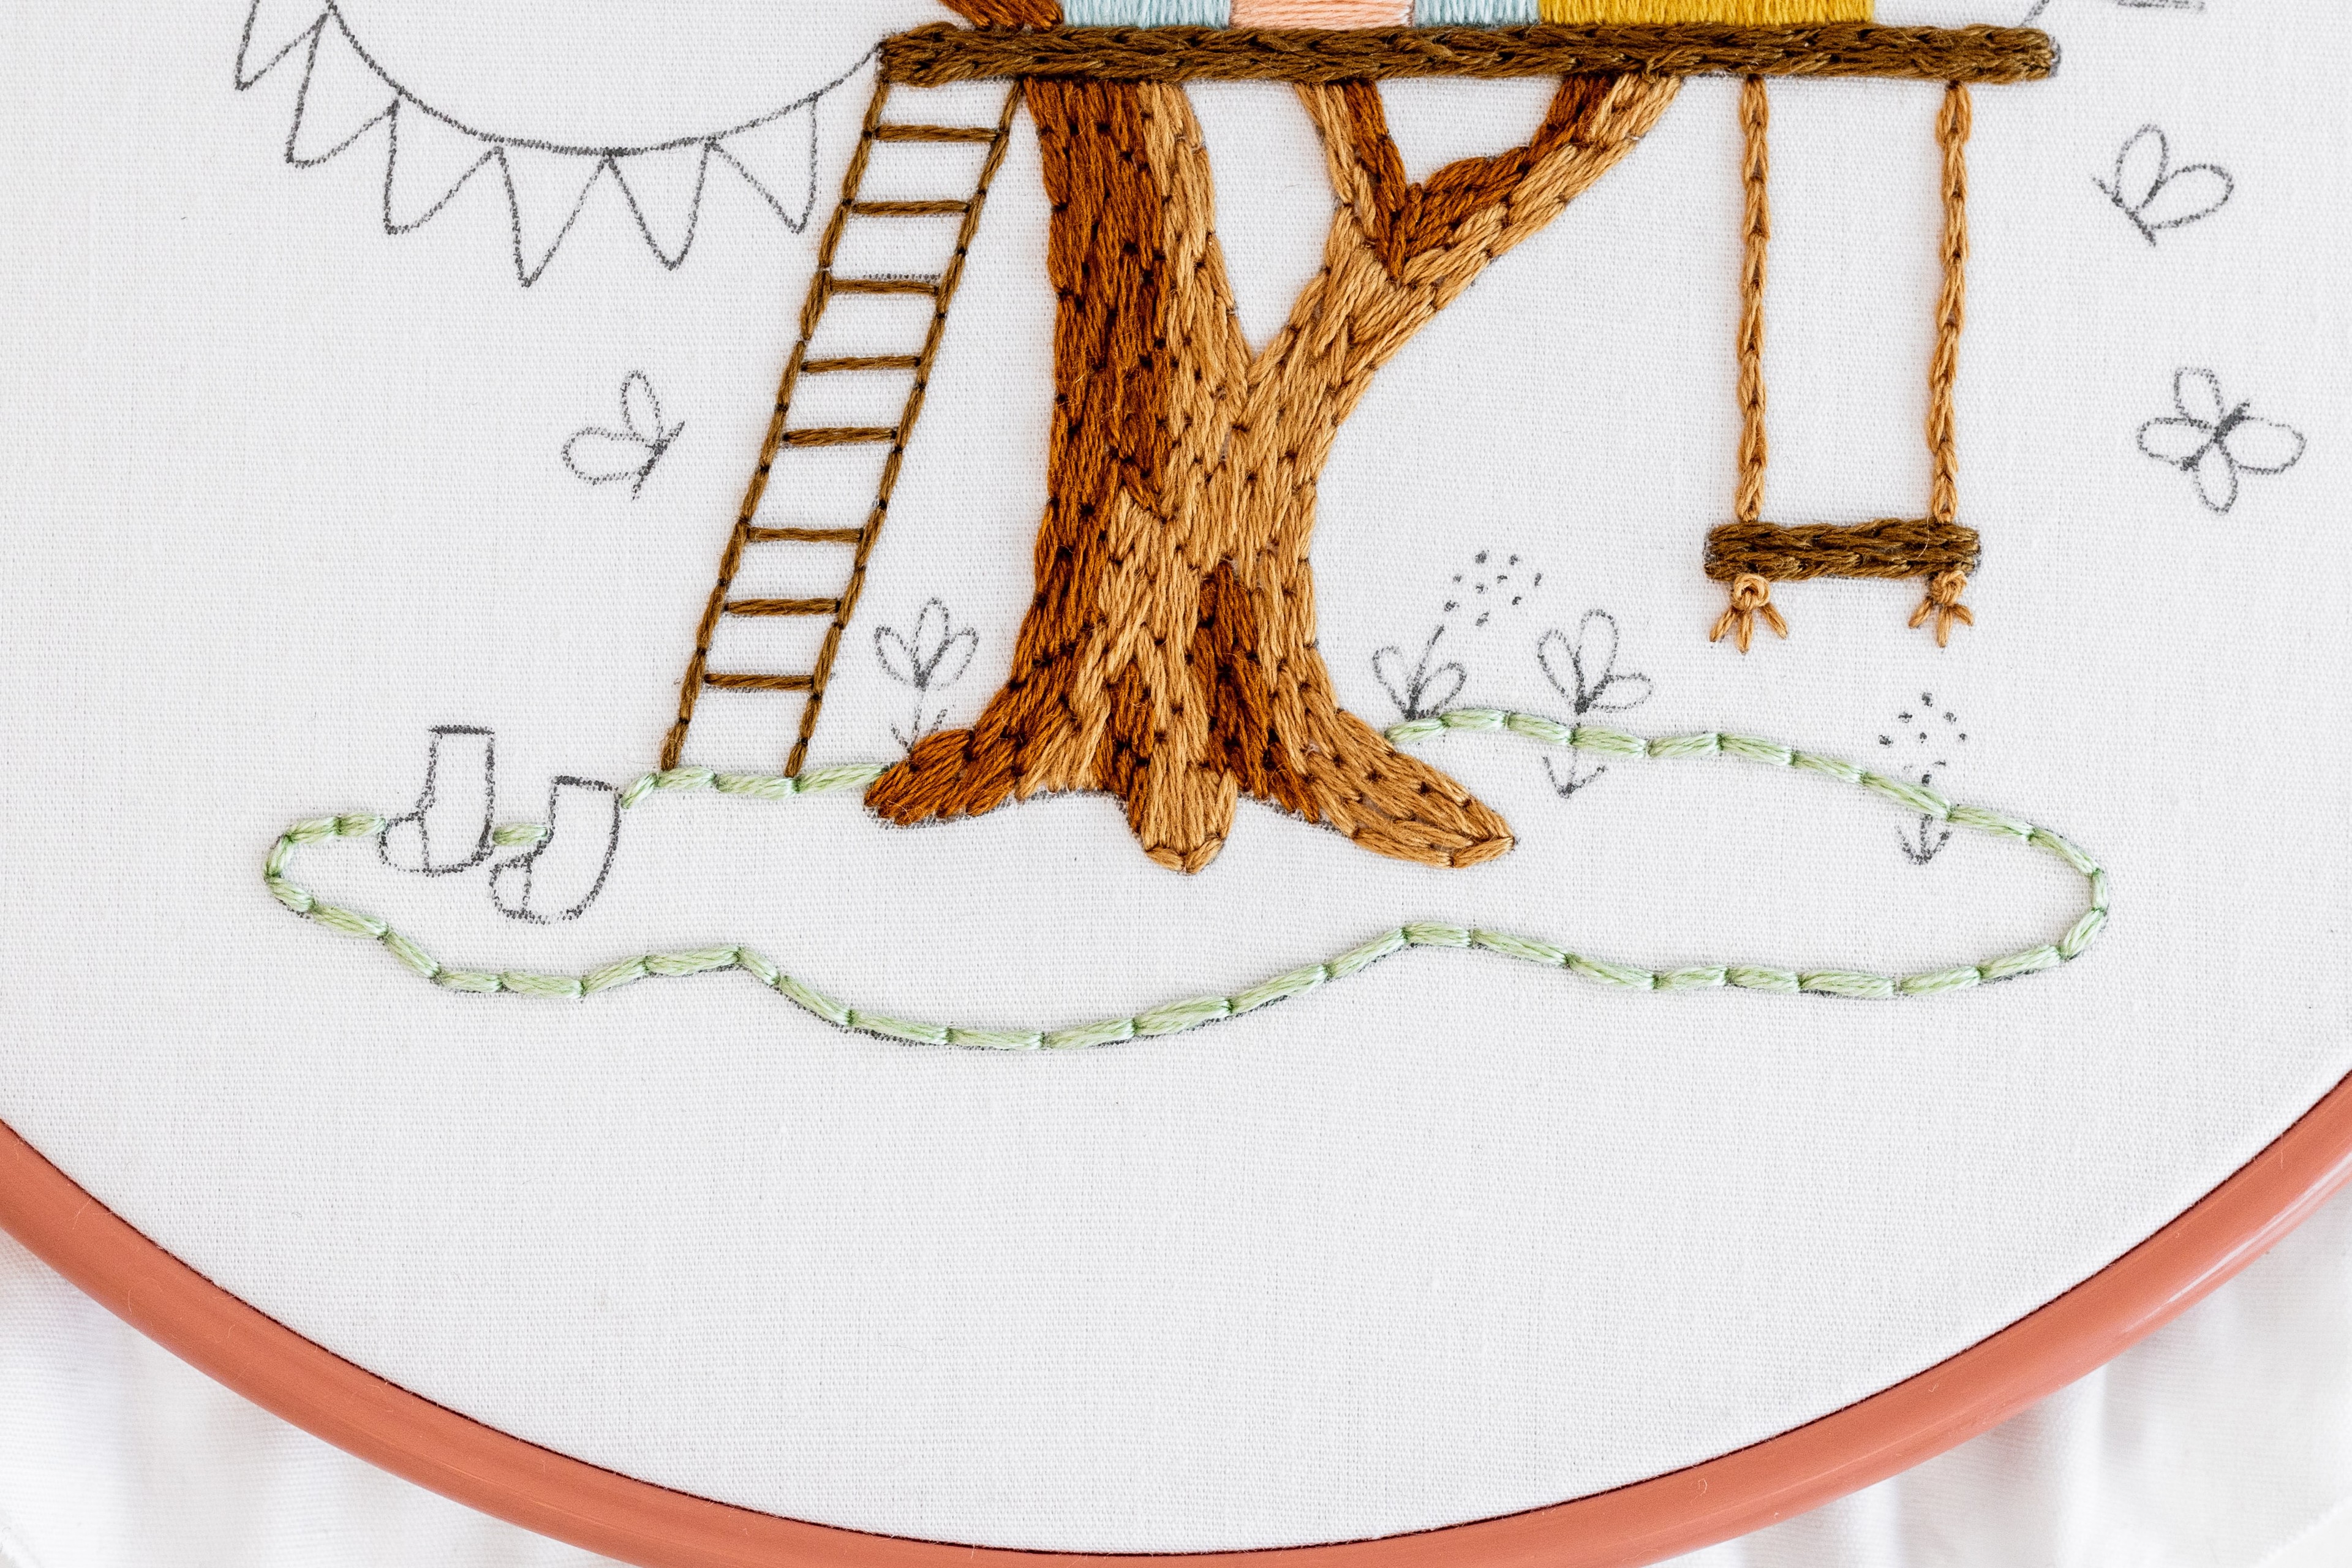
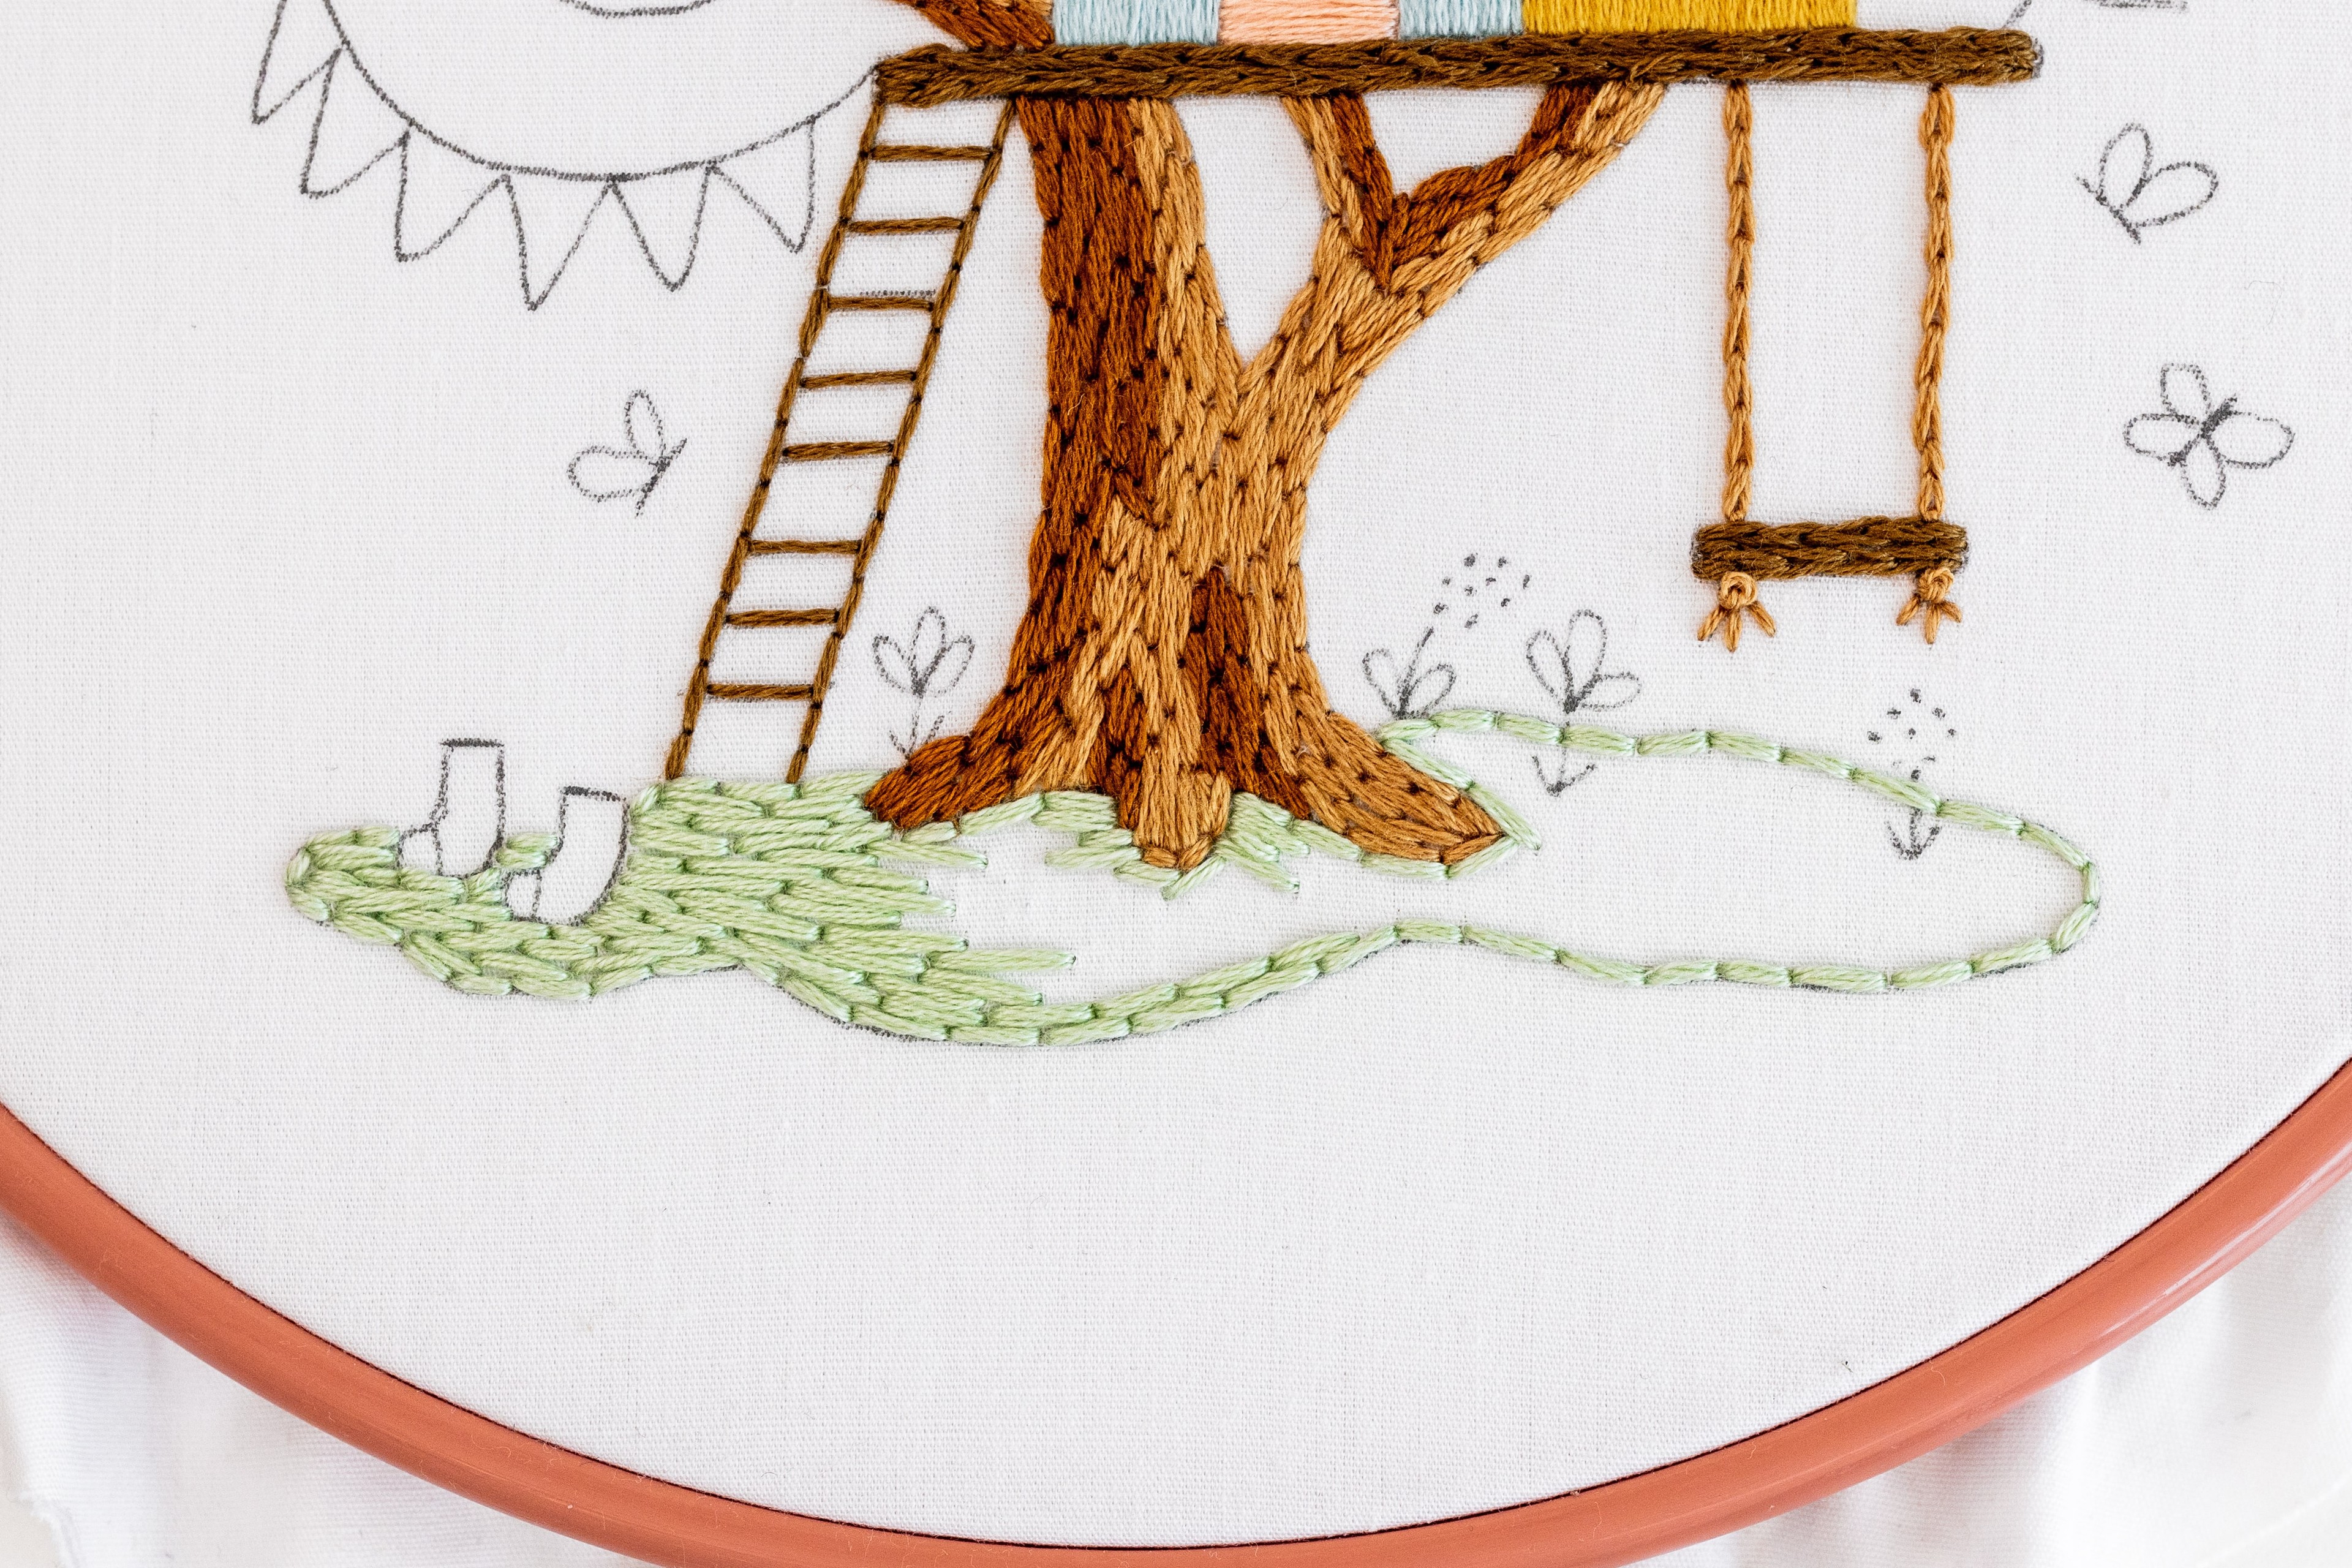
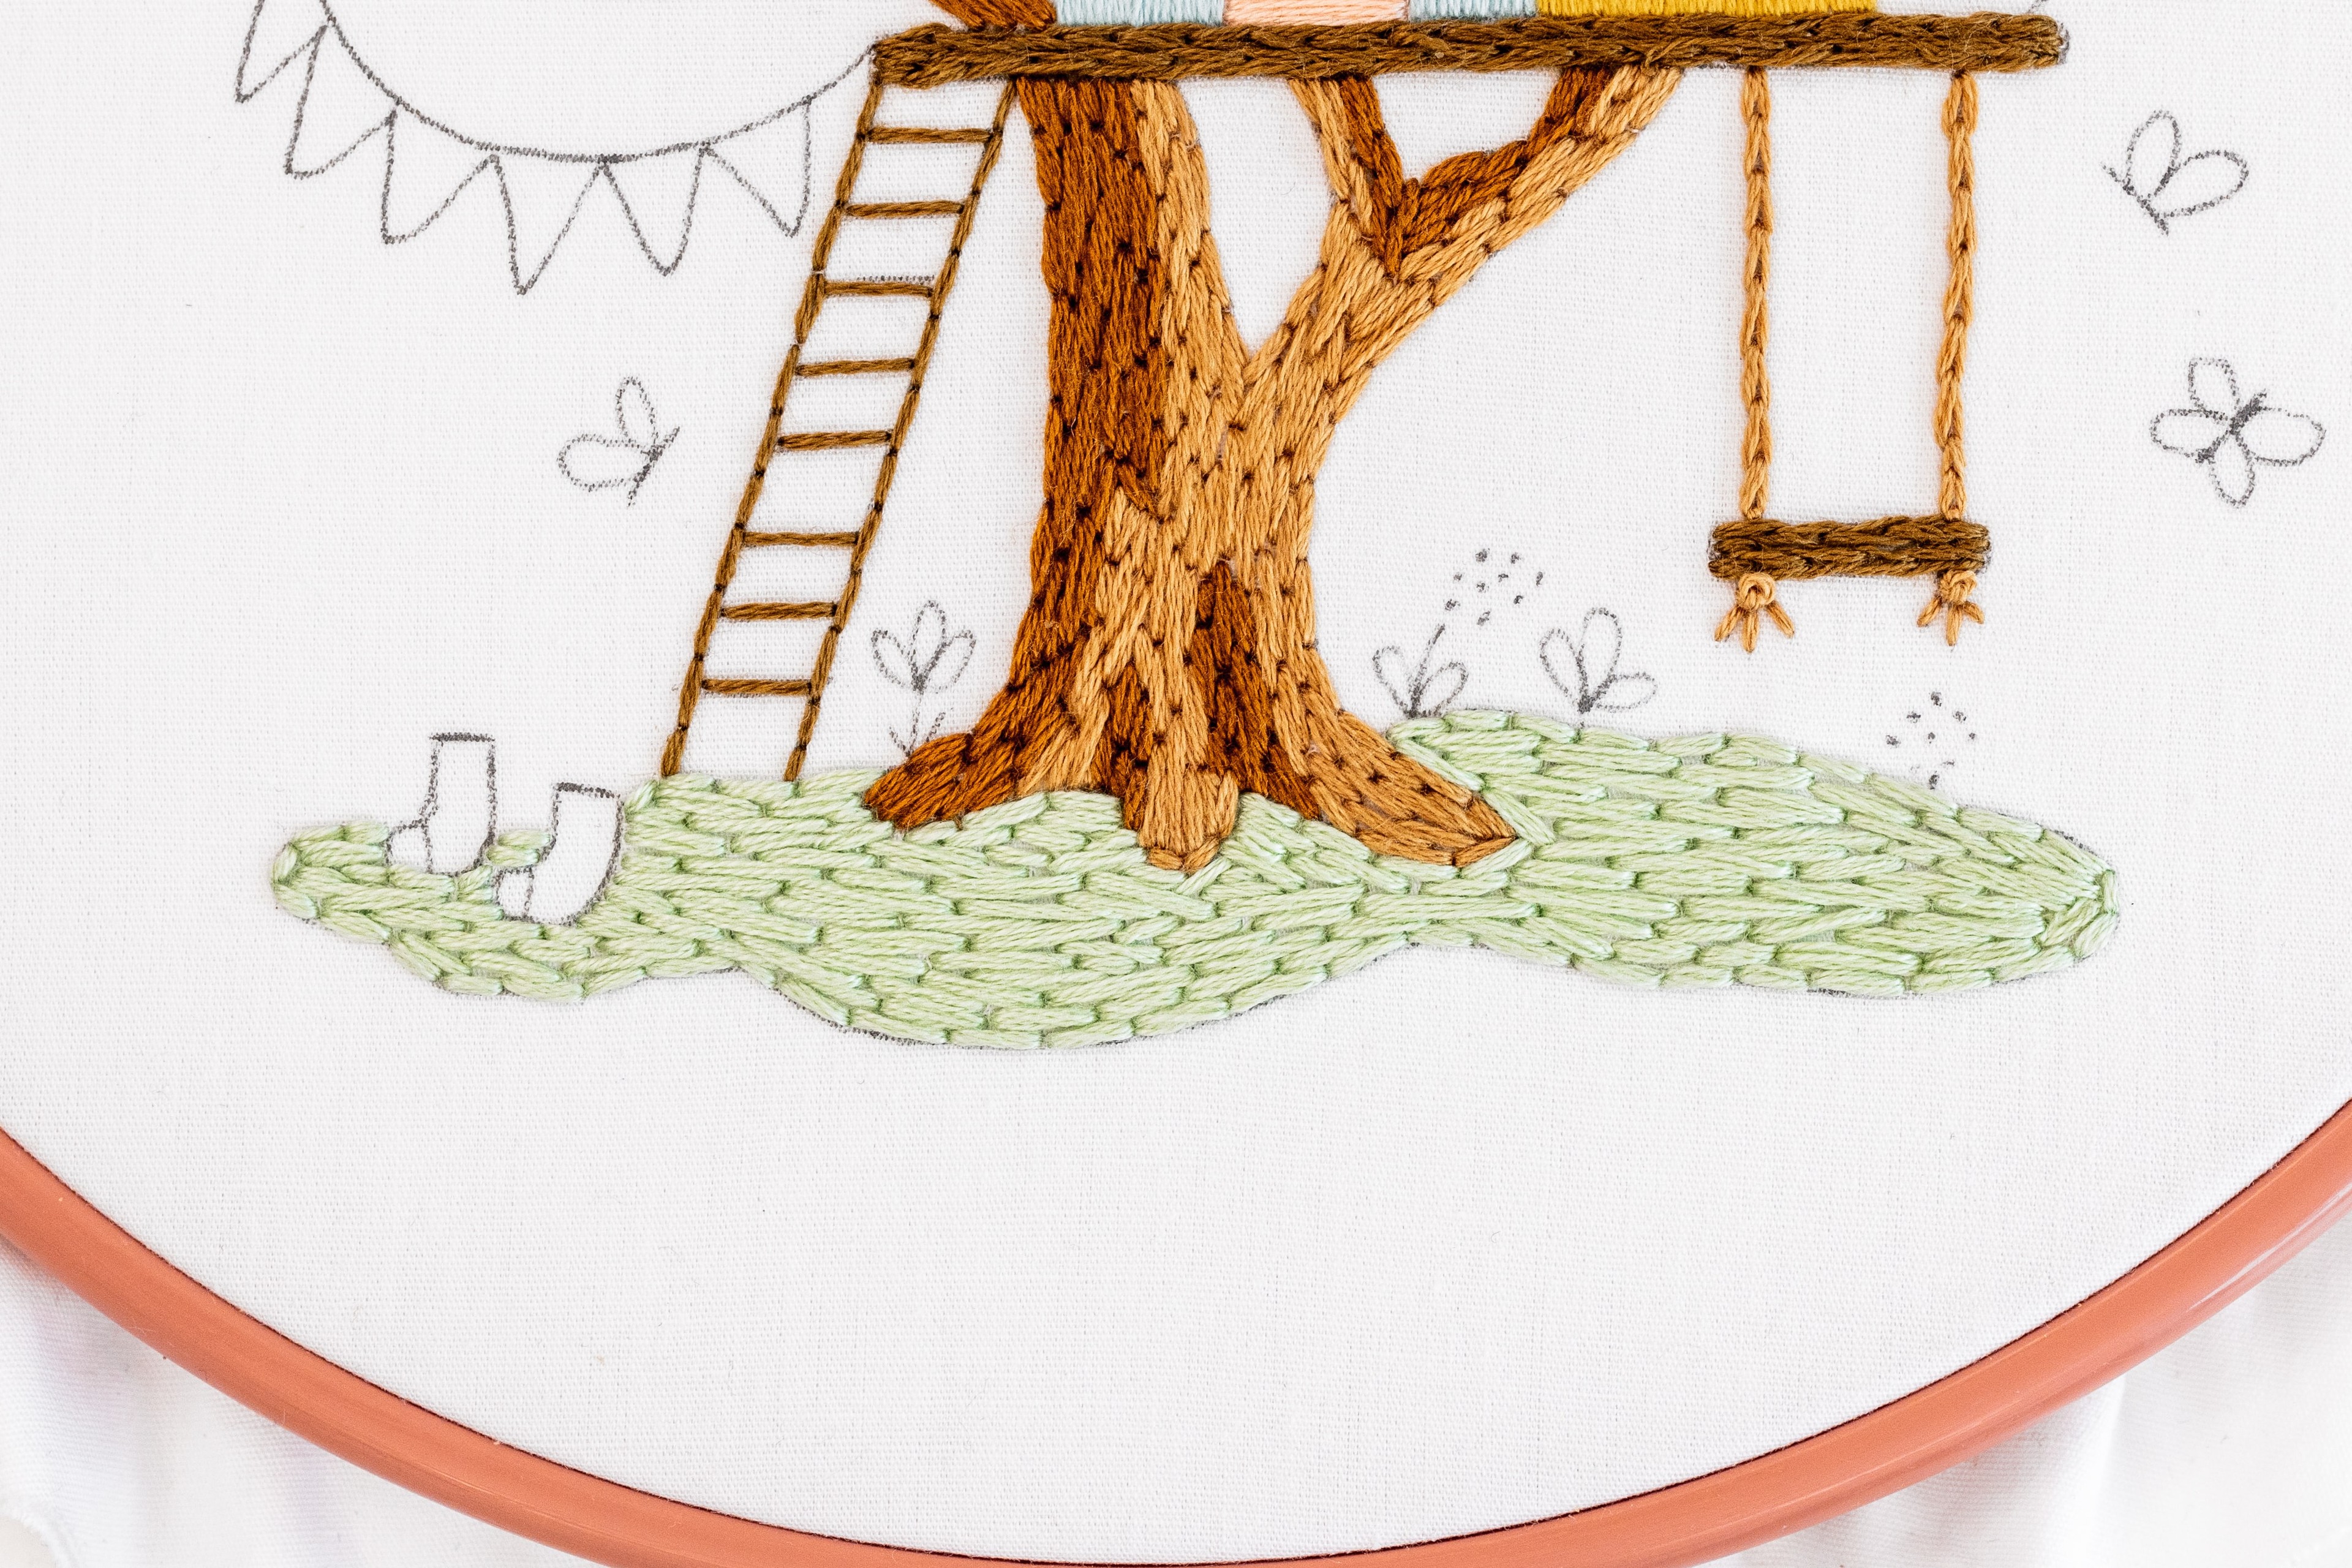
If I’m working on a shape with a curvy or interesting outline, I will often outline all or some of the shape in Back Stitch first. Then I’ll fill in the shape from one side to the other with the Long and Short Stitch method. I find this gives a nice clean edge, and helps to keep my stitches on track.
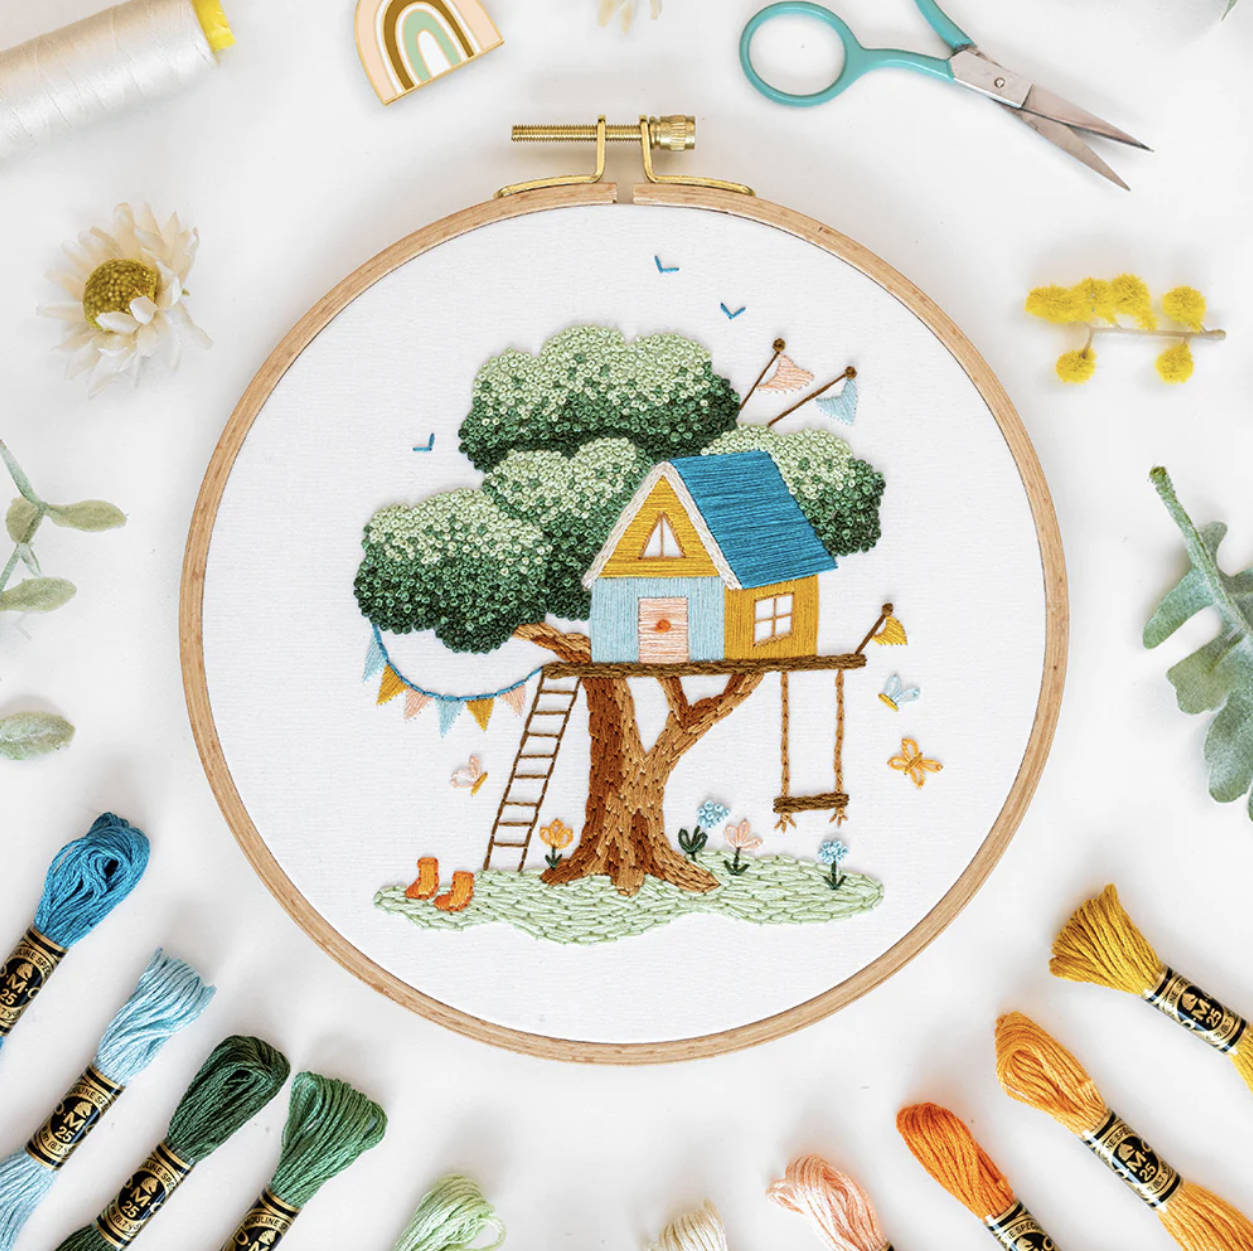
See how I used this method below to work the grass in my pattern ‘The Treehouse’ – first I outlined the area of grass with Back Stitch, then I filled it in from the left to right with Long and Short Stitch.
2. BACK STITCHED AREAS
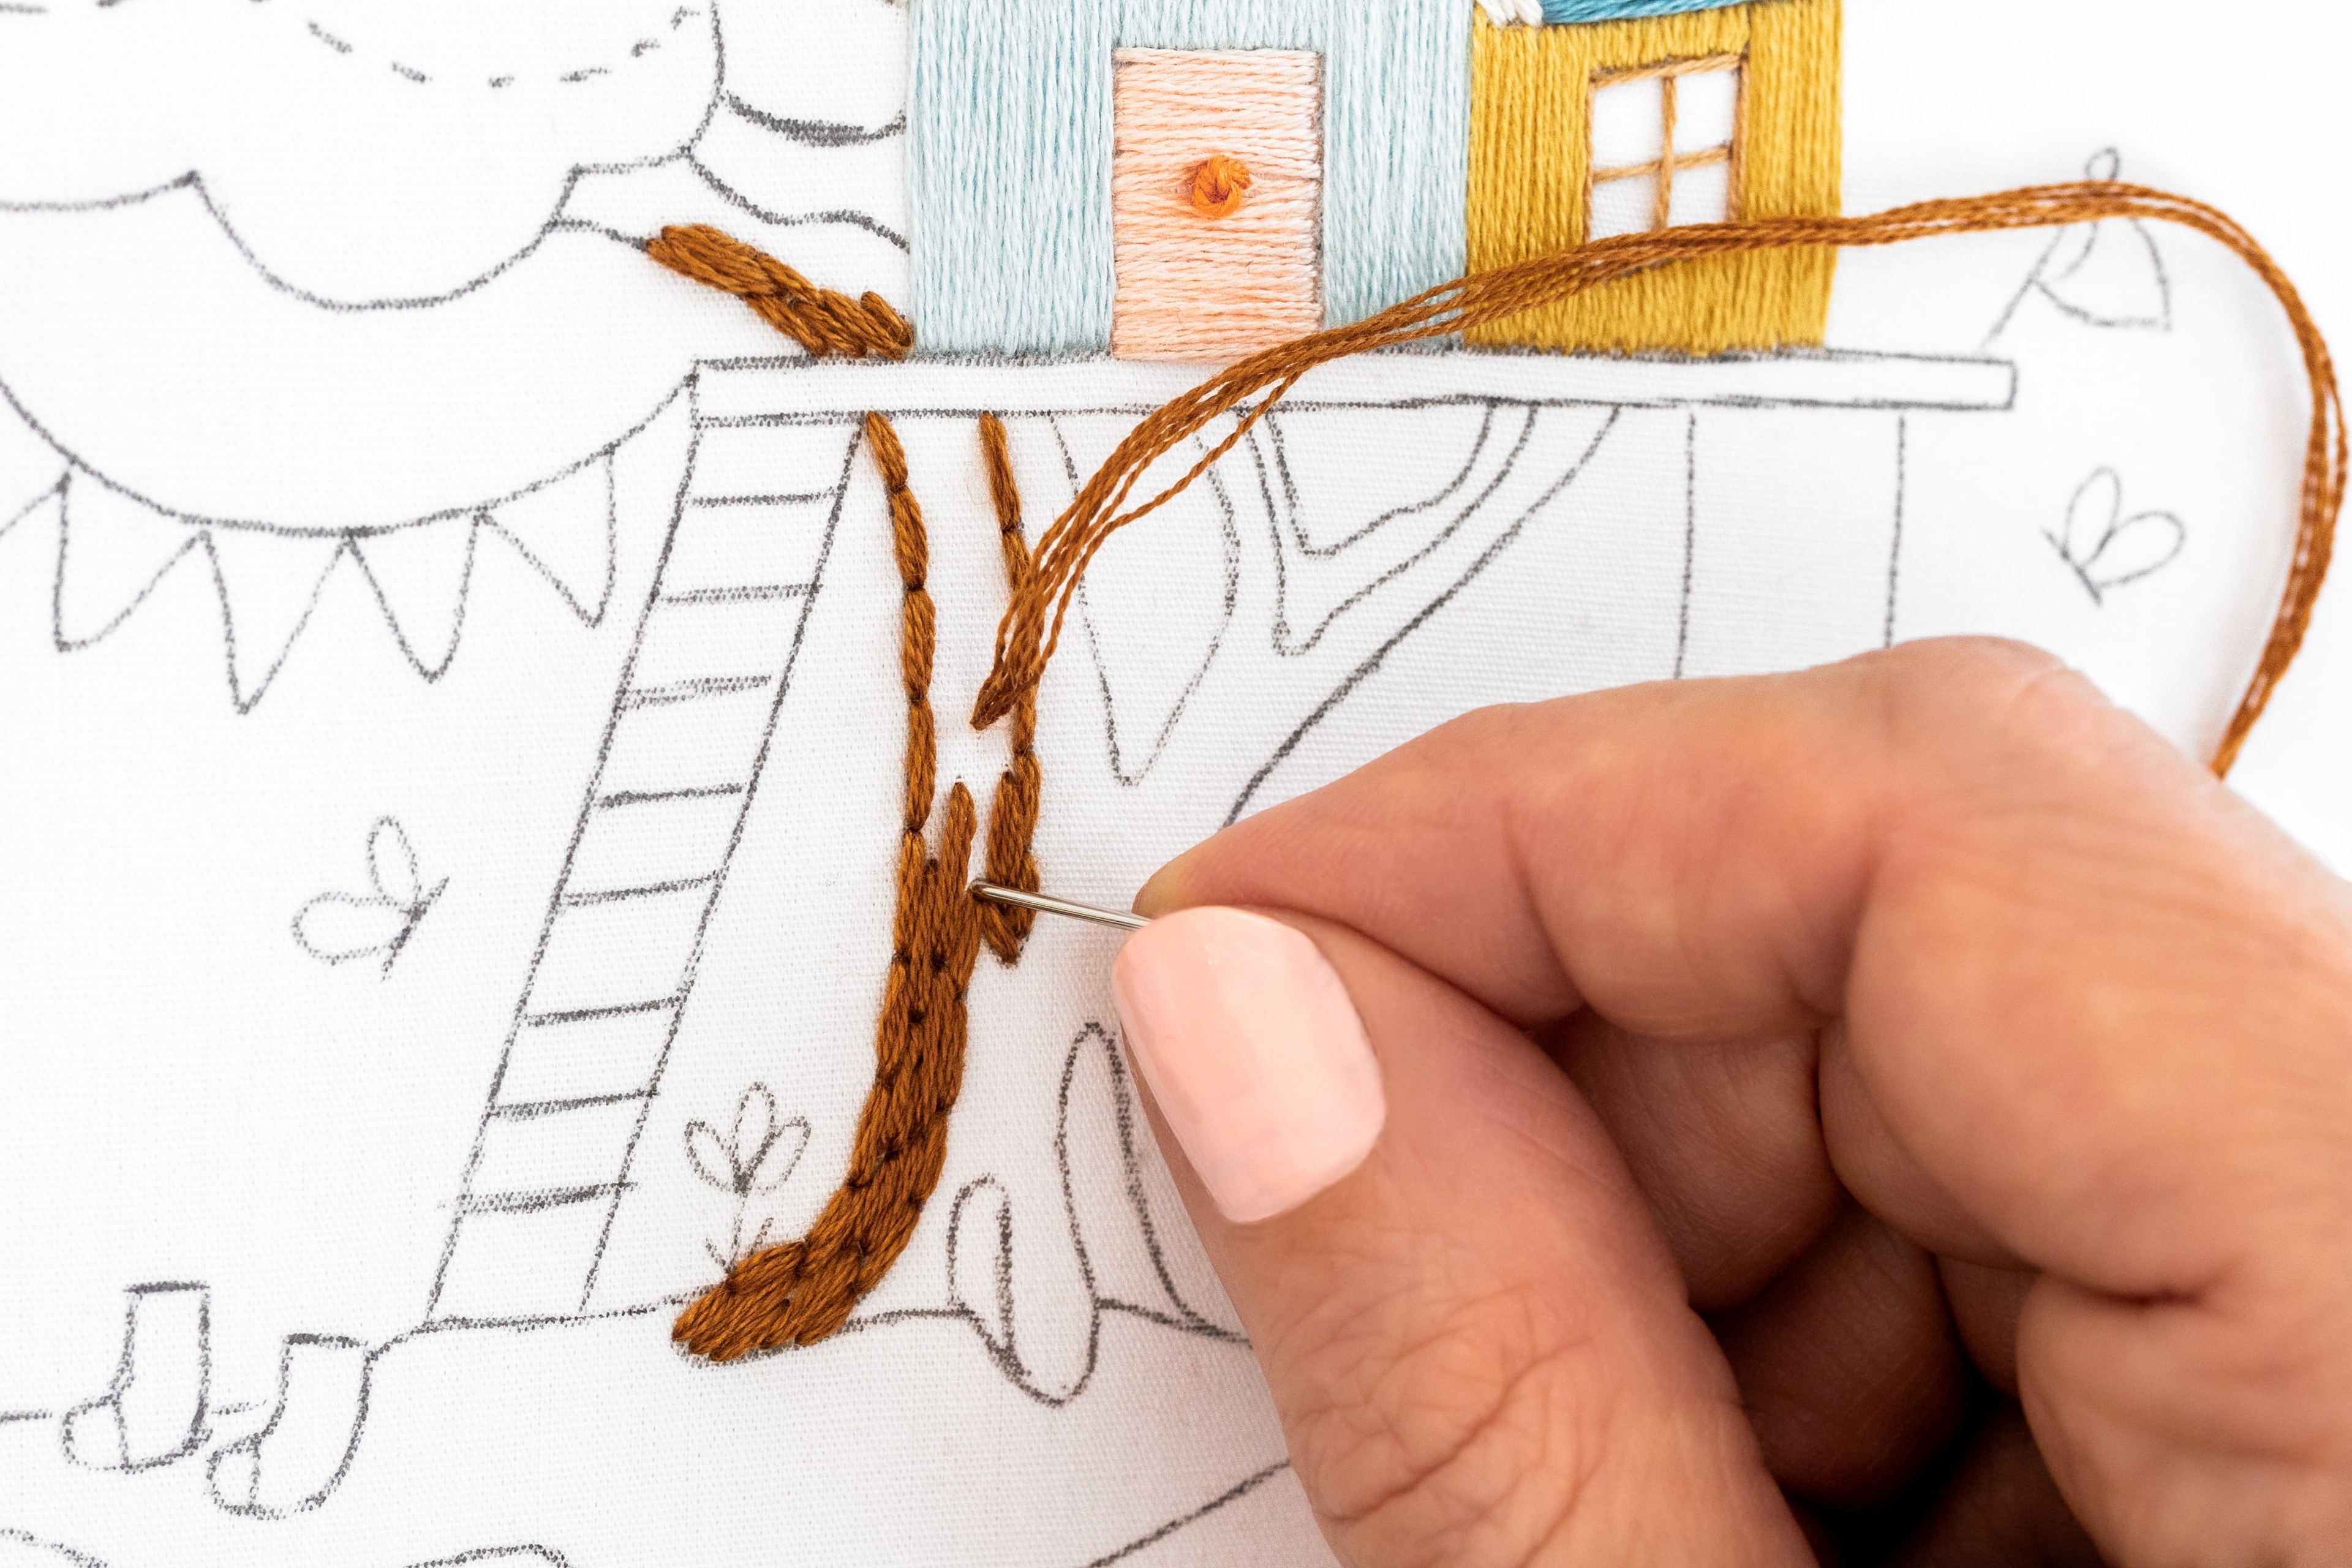
Sometimes I’ll work a small area of the shape with rows of Back Stitch, especially if the shape is quite narrow. Then I’ll jump back to the usual Long and Short Stitch method.
See this tree trunk in the same pattern – some areas were so narrow that I simply filled them with a couple of rows of Back Stitch.
In summary, I bet you won’t even notice when you’re done, because the Back Stitch and Long and Short Stitch blend together so well, creating a smooth and cohesive look.
Colour Shading
Working the Long and Short technique is a wonderful way to add colour shading to your patterns! Don’t overthink it, just introduce new colours into your design as needed, and use the staggered stitch lengths method to blend them in.
I find it helps to do quite varied and different stitch lengths along where the two colours meet, to help them blend in nicely. For example, feel free to stitch quite deep into the adjacent colour.
See these examples here of the flower petals and leaves using the ‘thread painting’ technique with finer thread.
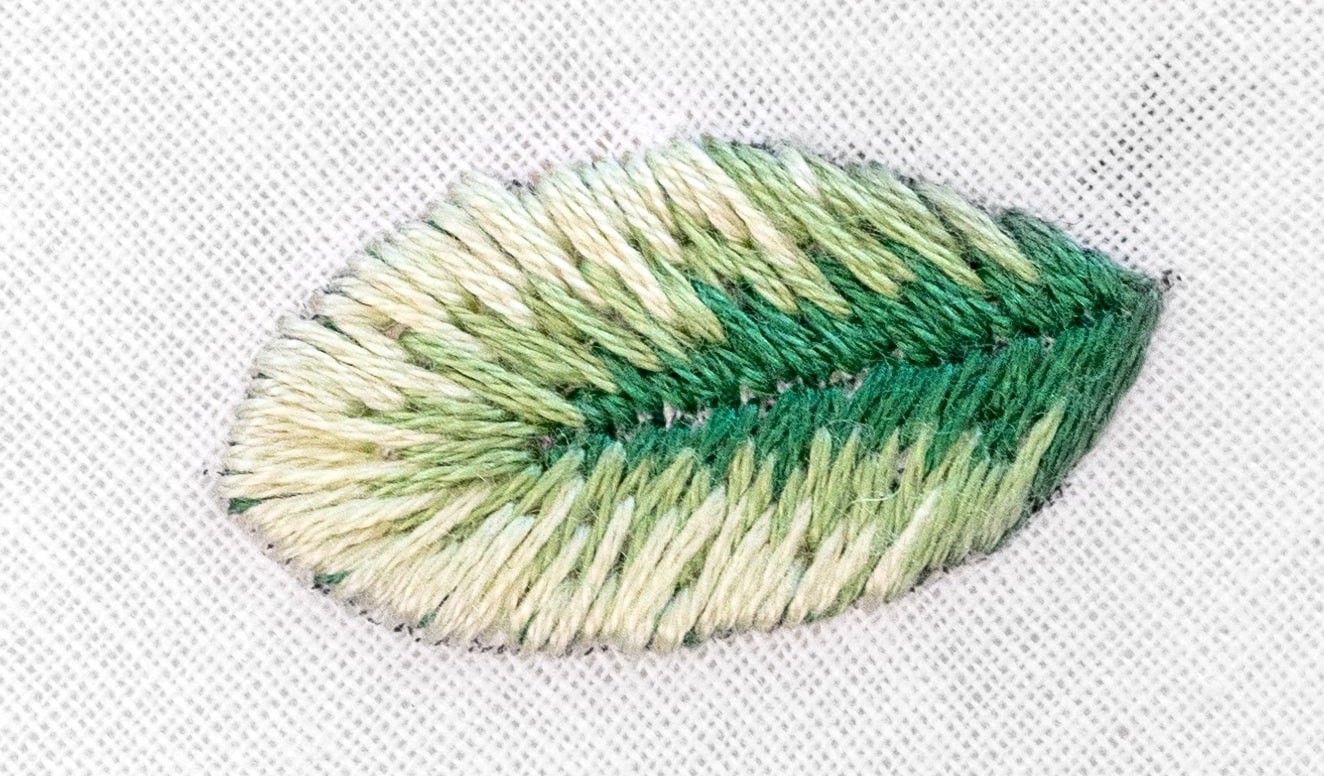
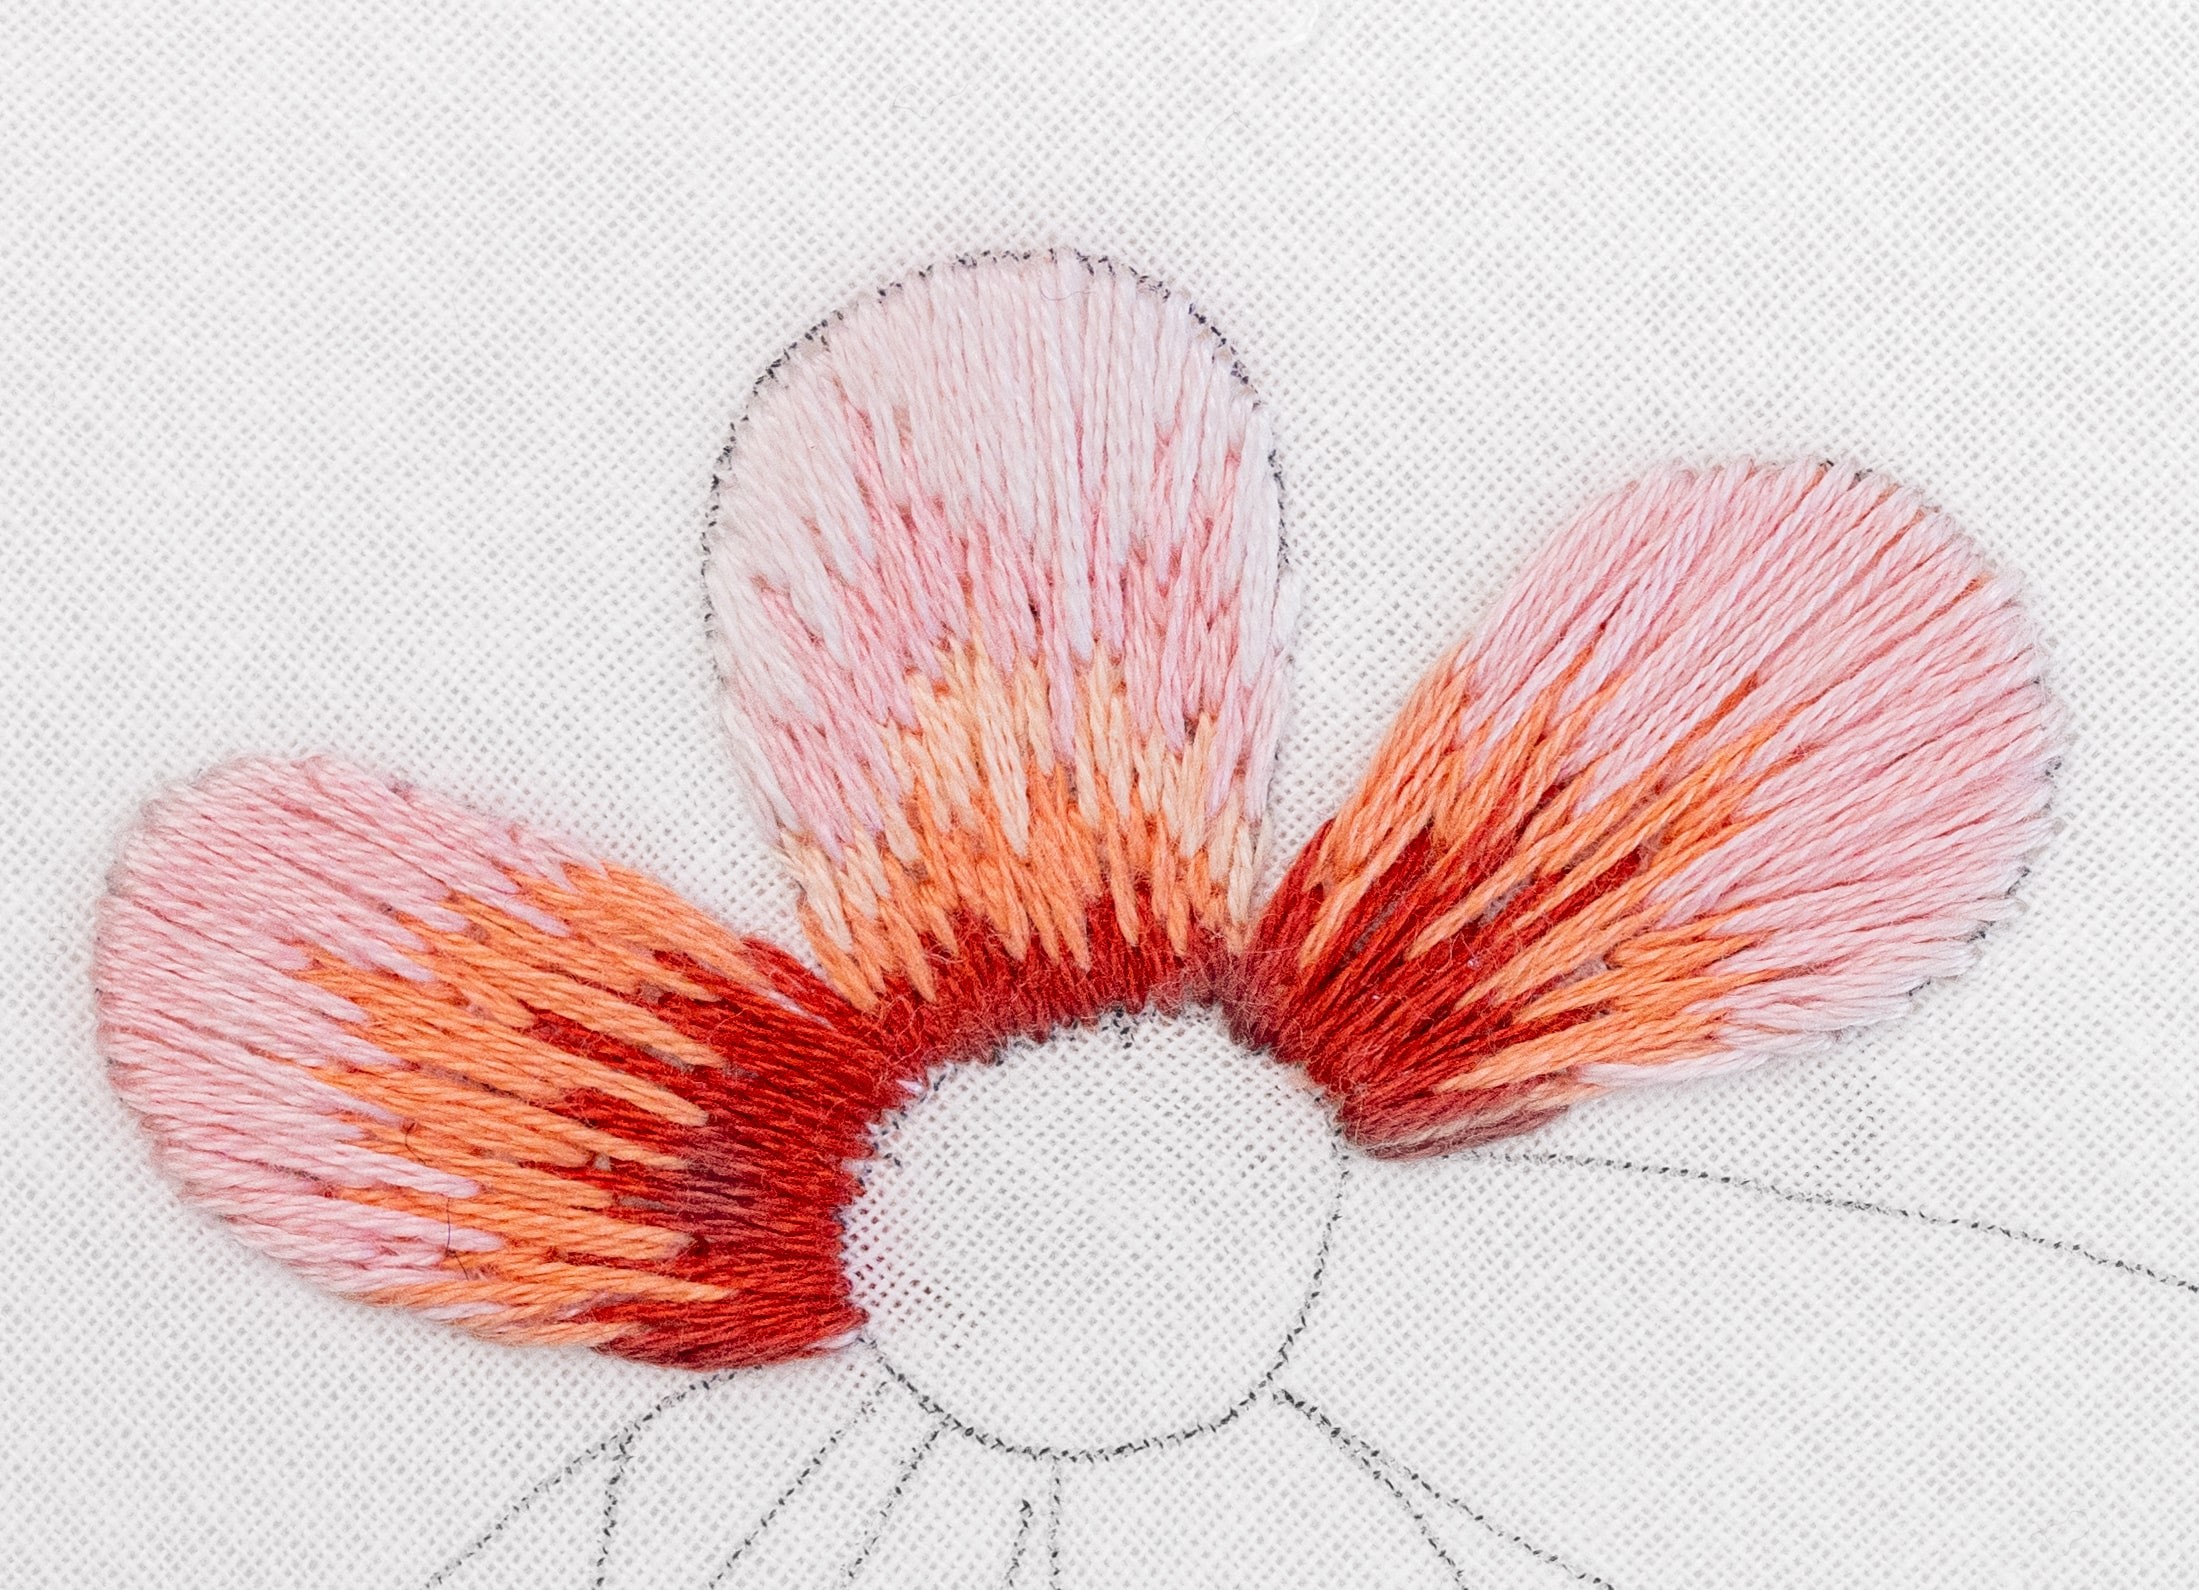
Now you can compare this with the more abstract technique in the cloudy sky, bunny, and the chunky petals. They all look unique and lovely!
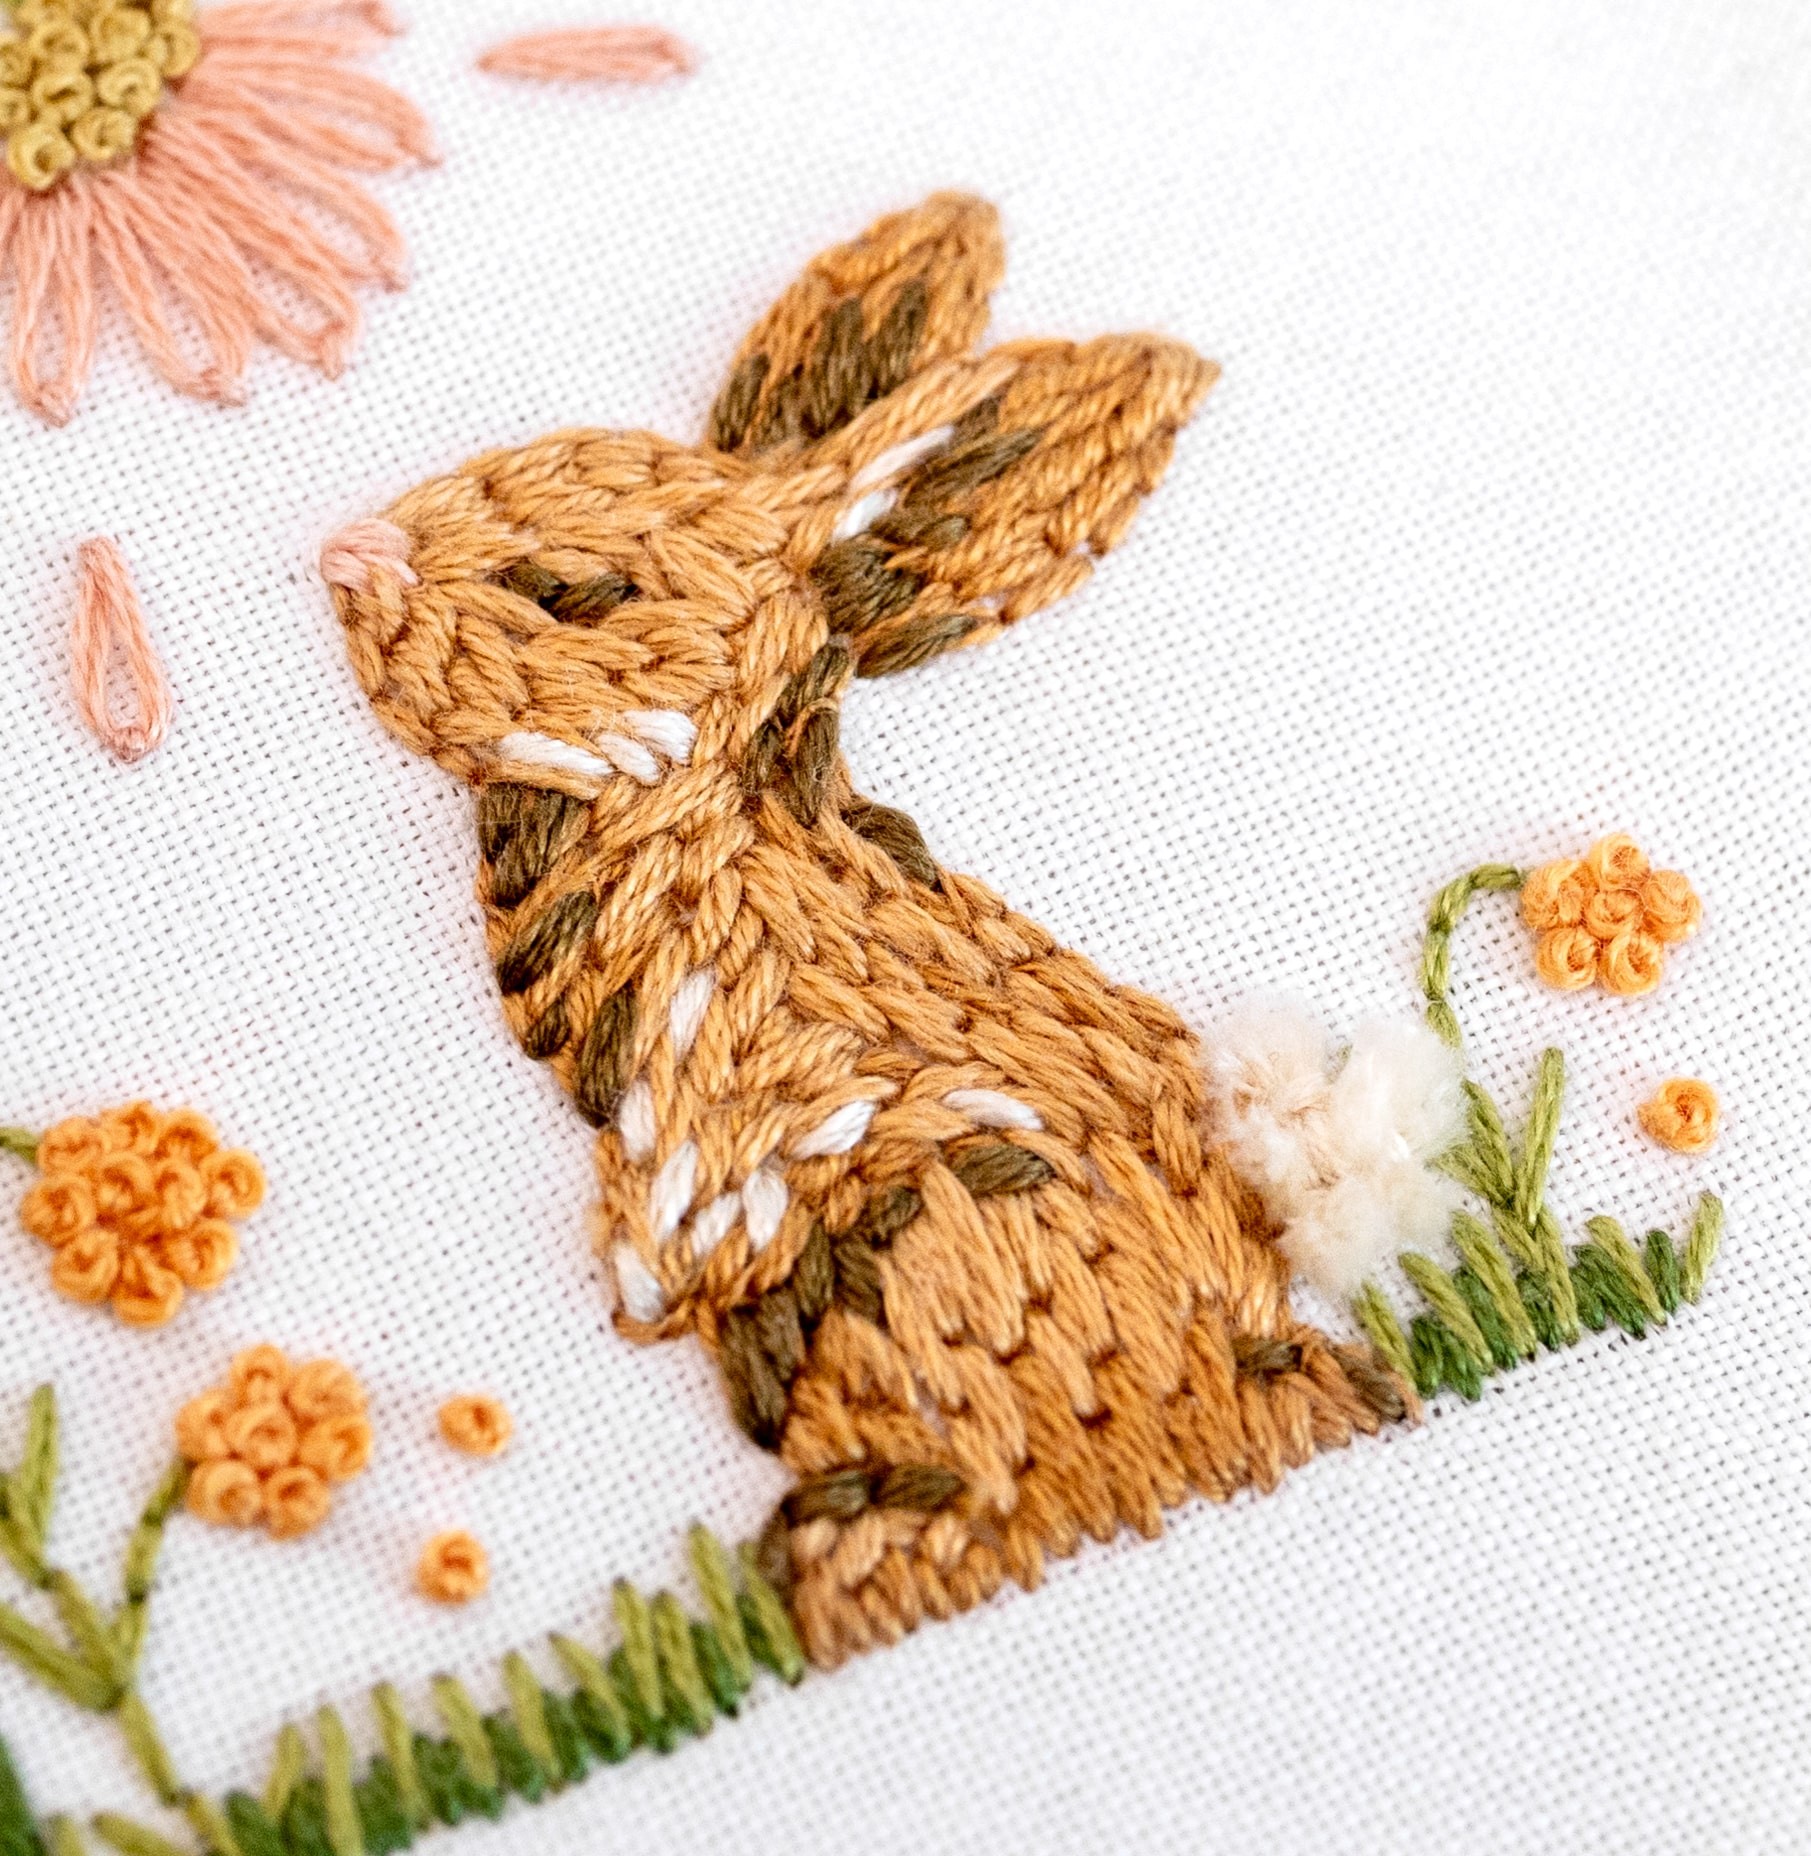
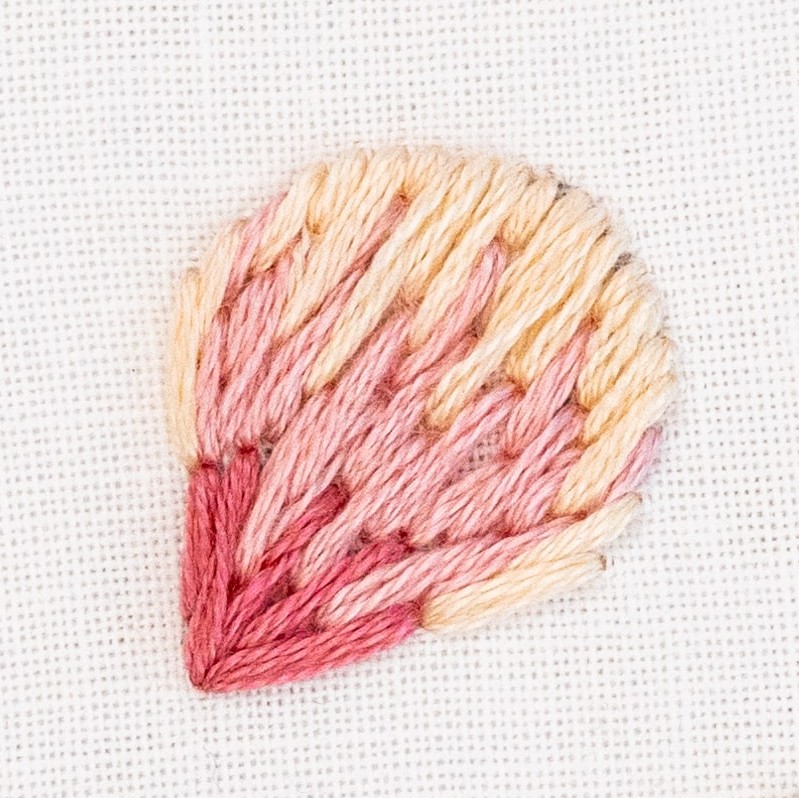

Split Long and Short Stitch
Another lovely variation on this technique is to incorporate Split Stitch into the mix.
So when you work each row of stitches, rather than bringing your needle up just beside your previous stitch, split through the previous stitch instead. This helps to create even more of a blended effect. And it’s a super forgiving method too!
Examples of Long and Short Stitch in my patterns
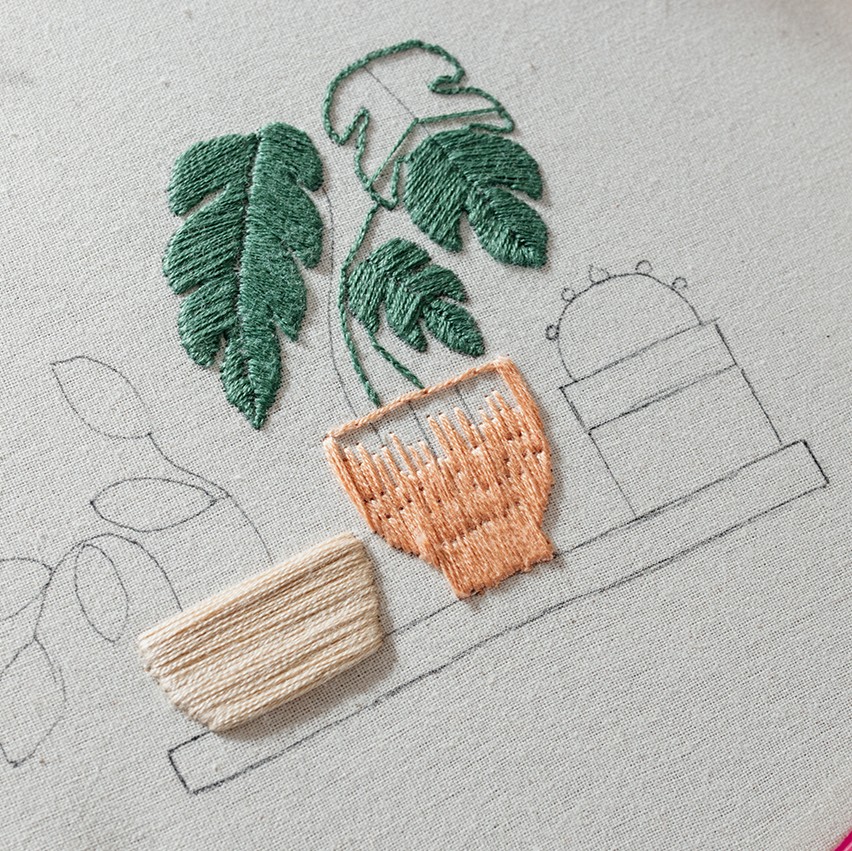
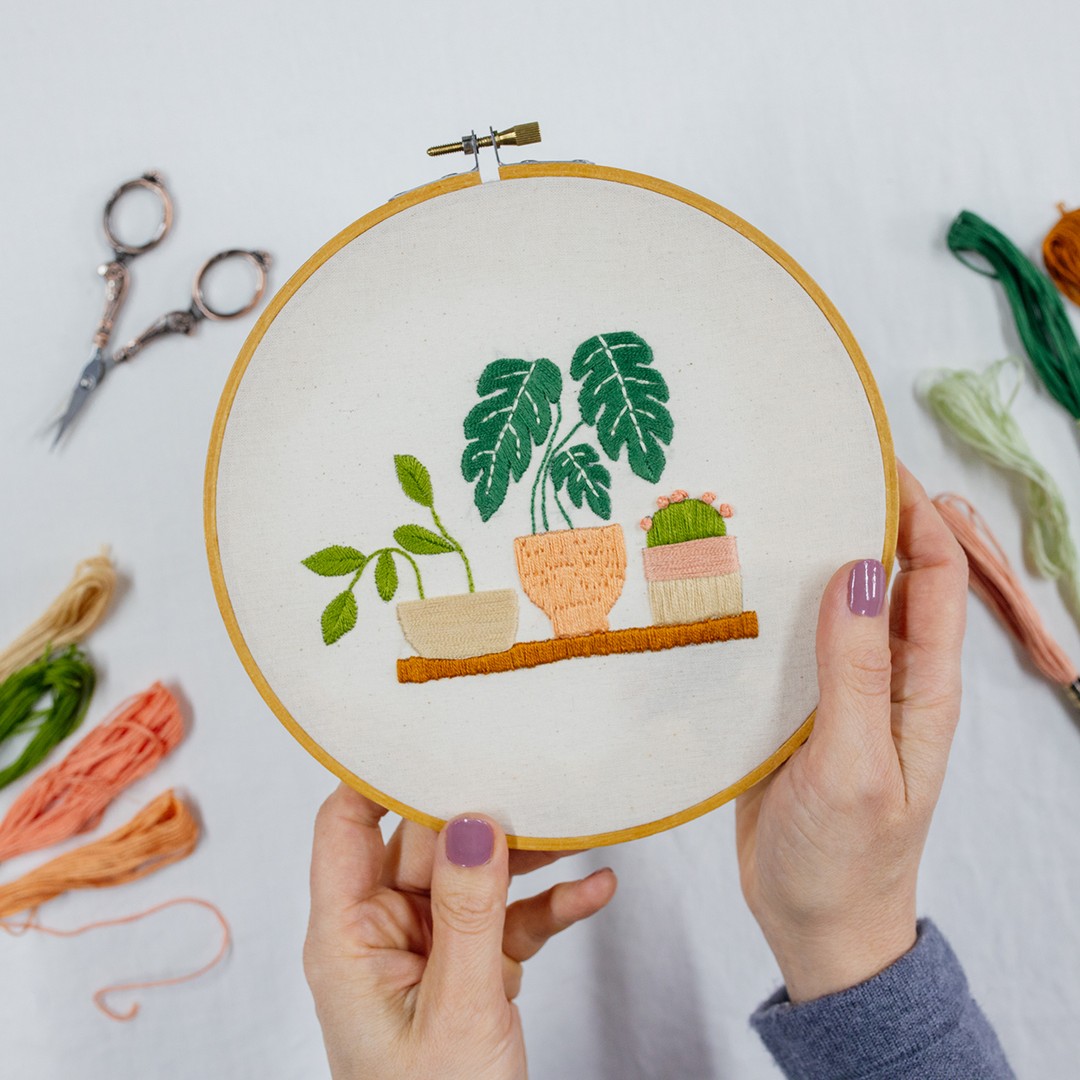
Here is an example of Long and Short Stitch in one of my patterns - Pot Plant Shelfie. See how the middle pot is filled with a beautiful even effect?
That's Long and Short Stitch!
The Treehouse pattern uses Long and Short Stitch to fill in the area of grass and the tree trunk.

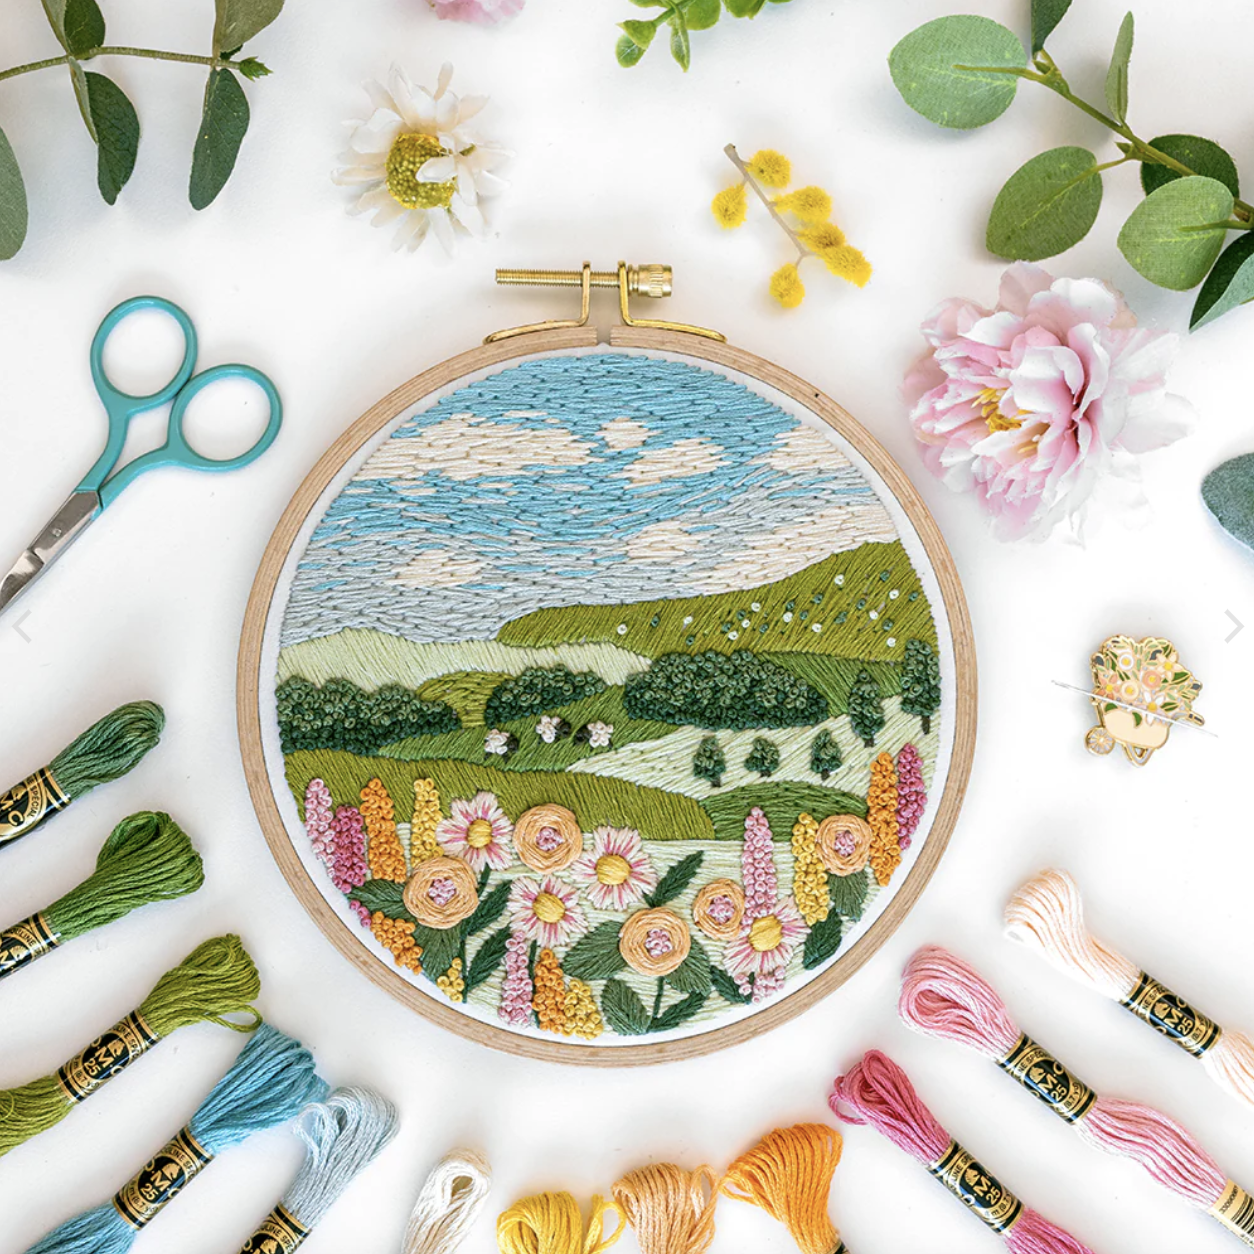
The Spring Meadows pattern uses Long and Short Stitch to fill in the sky and areas of the rolling hills.
Conclusion
Overall, I encourage you to focus on having fun with this technique, and filling your pattern with lovely areas of texture and colour! Whether you use less or more strands of floss, and keep it structured or free, it’s all good!
By keeping progress over perfection in mind, you’ll be able to practice and improve, and find a method that works for you. And I’m sure you’ll end up falling in love with this technique, just like I have!
What's next?
Our beginner embroidery kits are a favourite among new stitchers for their simple, step-by-step instructions and beautiful designs that make learning easy and fun. Whether you’ve been wanting to learn embroidery or are just searching for your next creative hobby. These kits are the perfect introduction to embroidery.
Why people love our beginner kits:
-
Everything you need is included: fabric, thread, hoop, and more!
-
Clear instructions to guide you every step of the way.
-
Gorgeous designs you’ll be proud to display.
Our most popular beginner kits


